Jesse Tree Activity 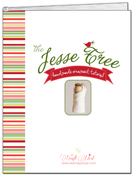
A great Advent Activity for your family! Order my Jesse Tree Ornament Tutorial today and create your own holiday tradition. Find out more here.
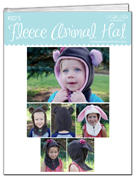
Sew this hood style animal hat to keep your child warm this winter. Purchase pattern here.
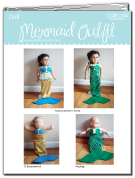
Easy to make mermaid costume pattern for American Girl Dolls or 15" Bamboletta. Purchase pattern here.
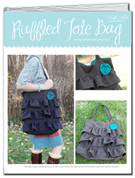
Sew this beautiful ruffled tote bag for yourself or a friend. It's sure to bring compliments. Purchase pattern here. |
By Alanna George, on July 18th, 2012 

It’s the second week of our Summer Day Camp series and our Camp Instructor for this week is Amanda from Ninth Street Notions. Her project is a Found Object Mobile. My kids are excited to make this at our house (we have bags full of “treasures” we can use to make it). You can visit her blog post for detailed instructions for completing this craft at: Ninth Street Notions.
If you have a summer day camp craft idea and would like to be one of our camp instructors we would love for you to join in, you can email me at: alannageorge(at)alannageorge.com
Visit next week for another summer day camp project!
By Alanna George, on July 11th, 2012 
I am so glad you are joining us for our first ever online Summer Day Camp project. My kids and I had a great time making these Hula Hoop Hideouts and they hung in the trees for days while the kids continued to play in them and eat snacks in them. (I was hoping I would get lucky and someone would actually fall asleep in one.) If your kids are like mine they will love having their own hideout.
Supplies:
- Hula Hoop (Mine are from Dollar Tree for $1 each)
- Safety Pins
- Twine or Rope
- Tulle and/or Ribbon (Mine is from Jo-Anns Dollar bin)
- Sheets
- Scissors
- Cushions and Blankets
How To:
- Pin the top edge of the sheet to the hula hoop by folding the sheet over and pinning it to itself. (see pic below)
- Use twine to create a hanger to tie your hideout to the tree with. I used two long pieces of twine and tied each piece to opposite sides of the hula hoop. The two pieces then criss-crossed over each other. I tied the two together where they criss-crossed with another piece of twine. Later I used that piece to actually tie the hoop into the tree.
- Tie on tulle and ribbons or any other embellishments you have. (see pic below)
- Hang the hideout from a tree branch.
- Add blankets and cushions underneath your fort so you can be nice and comfy.
- Take a little nap or eat a snack inside your new hideout.
I hope you enjoyed this post. Visit here next week to see our next Summer Day Camp project by Amanda from Ninth Street Notions.
* Click on the thumbnails below to see them full-size.
By Alanna George, on July 3rd, 2012 
Are your kids complaining of boredom yet? Our Summer Day Camp featuring Kids Crafts will be starting next week. I am excited for you to see all the projects we will be showing you. So check back here next week to see our first post. We will be posting at least one day camp style project each week.
I also want to introduce you to some of our Camp Instructors.
Katie from Katie’s Nesting Spot
Katie is a Kindergarten teacher turned blogger. She shares tons of family friendly crafts and product reviews on her blog. She also co-hosts A Crafty Soiree where you can link up pictures of the projects you made. You can find Katie’s blog here. If you are interested in linking up your latest project visit A Crafty Soiree here.
Amanda from Ninth Street Notions
Amanda is “learning to create, one craft at a time” and she shares her journey on her blog, which you can find here. She also has an Etsy store where you can purchase her latest creations, check out her store here.
Sarah from LimeMade Designs
Sarah is a natural crafter and a truly talented sewer. She has an Etsy shop featuring an amazing array of sewn items. Visit her shop here.
Alanna from The Craft Nest
Well, that’s me. If you are here then you hopefully know a little something about who I am.
If you are a blogger and have an idea you would like to share via the Summer Day Camp I would love for you to join in with us. Just email me at: alannageorge(at)alannageorge.com. You can read more details in my previous post here.
* So join us next week for our first project that will help take the boredom out of summer!
By Alanna George, on June 25th, 2012

I love the way this scalloped paper garland looks! This garland is so easy to create. I have seen lots of cute ones made from fabric, but that seemed like a lot of work to me. I came up with this easy idea to make one from patterned scrapbooking paper so it would look very similar to fabric. This garland is the perfect party accessories, it makes any room look festive when it is hung across the wall. This banner is so versatile you could use it for a birthday party, a baby shower or even a wedding shower! It would be cute with some paper letters attached to spell out the occasion.
How To | Paper Party Garland

Supplies:
- 12×12 Patterned Paper
- Bias Tape
- Scalloped Edged Scissors
- Glue
- Large Bowl or Circle (for tracing)
How To:
- With a piece of patterned paper laid out, trace a large circle onto it. You can trace around the edge of a large bowl (that is what I did) or cut out a 12″ diameter circle template from a piece of paper.
- Cut out the large circle from your patterned paper and cut the circle in half.
- Repeat steps 1. and 2. until you have the desired amount of scallops.
- Use your scalloped edge scissors and trim along the curved edge of each scallop.
- Lay out your bias tape. Open up the edges of the bias tape and slide the straight edge of the paper scallop inside. Glue each scallop to the bias tape by adding glue along the top of the straight paper edge. Let dry.
- Hang your garland on the wall and get the party started!

By Alanna George, on June 21st, 2012 
How’s your summer coming along? We are busy here playing in the sprinkler, going to basketball camp and playing t-ball. In between all our summer activities I have been playing catch up on a few projects that have been hanging out in my to-do pile. Do you have a craft to-do pile or am I the only one?
Back in September I attended The Creative Connection (read more here), it was an amazing experience, but I had a few finishing touches to put on some of the projects I started while I was there. Above you can see the awesome canvas I created (and finally finished) in the I Have An Idea – Vintage Canvas class taught by Melody Ross of Brave Girls Club. It is currently sitting along the back edge of my desk providing me inspiration.
While I was there I also took a the Button-Tufted Family Tree class from Wendy Smedley and Stacy Julian of Big Picture Classes fame. When I left the class I had four frame pieces and the tufted button board. I was finally able to assemble the whole project and hang it on my wall. Over the rest of the summer I am planning on taking some Instagram photos of our sibling’s families on both sides and attaching them with cute push-pins to the tufted board. I will try and post more pics as I fill it in with photos.
With the end of school came lots of teacher gifts, but I couldn’t forget about our lovely bus driver. I had spotted her wearing a hat a couple of times and I thought a hat decorated with a cute fabric flower would be something she would love. So I used some muslin to create a fabric rose and I attached it to a hat bought from Target (see picture below). I should have snapped a picture of her wearing it two days later as she drove the bus route, super cute.
On the George side of the family there seems to always be a new baby arriving in the family. You know how I love to make crafty presents for gifts, right? I made a stuffed fleece penguin for the new little baby boy. He is so sweet and cute, I am hoping penguin becomes one of his favorite bedtime companions.
With all these crafty projects I had to make something for my hubbie for Father’s Day. He told me a couple months ago how cute he thought the fleece walrus I made for our son was and I decided to make one for him too. I knew the kids would love giving it to him for a Father’s Day present. I was right, now every night at bedtime my husband chooses who gets to sleep with Starfish the stuffed walrus. It is a special privilege everyone wants. Below you can see Starfish the walrus and his brother Jellyfish (my 5 year old son gave them their names).
I have a few more projects I am working on. I also hoping to get the Summer Day Camp posts started around mid-July. So stay tuned.
By Alanna George, on June 12th, 2012 
If you are looking for a cute and easy card to make for Dad, here it is. I used my littlest ones handprint to make this cute owl.
The inside says:
“Owl always love you. Happy Father’s Day.”
I love it, what a cute keepsake. It will be a great reminder of how little her hand was at 18 months.
How To | Handprint Owl Card
Supplies:
- Paper
- Acrylic Paint (Tan, Brown, Green and Yellow)
- Paint Brush
- Paper Plate
- Large Googly Eyes
- Glue
- Diaper Wipes
How To:
- Have your card all ready and lay it off to the side. Squirt some paint on a paper plate. Use your paintbrush to paint your child’s hand with acrylic paint. Hold their hand and press it in place on the front of the card. Slowly remove their hand. Use a diaper wipe if you have a small child and need to get the paint off their hand quickly!
- Paint your child’s pointer finger with yellow paint and have her make a finger print for the beak. Let the card dry.
- Use brown paint or markers to draw branches and green to add leaves.
- Use glue to add googly eyes to your owl.
- Write a sweet message inside.
By Alanna George, on June 4th, 2012 
By now you have heard that on Tuesday, June 5th 2012 there is an amazing event taking place in the sky called the Transit of Venus. My son has become very interested in the planets recently and is super excited to see Venus crossing between the Earth and the Sun. Since I was a little girl I have always loved the stars and the planets, so I love that he has become interested in this subject and that we can learn about the Transit of Venus together.
To read more about the Transit of Venus you can go here (make sure to keep scrolling past the first set of ads to see the viewing time table). This link also has a short video about making a solar eclipse viewer. You can also go here for a quick and easy diagram that explains how to easily make your own viewer. I recommend you look at this link before reading my instructions, it will make it super easy to follow along.

I also want to tell you that besides the pinhole viewer, I made a different sort of viewer with a large paper box lid. My thinking is that it might be hard for some of my littles to look into that hole and understand what we are looking at. I am hoping that by using this lid and projecting the image of the Sun onto a piece of paper, I can use a pencil to point out the black spot (Venus) on the Sun of our projected image. I did test both viewers out today during the time frame that transit will be visible in our area and I get a clear image of the Sun, so hopefully it will all work for us tomorrow. I have said a few prayers for clear skies!
How To | Pinhole Viewer
Supplies:
- Box (a shoebox will work too)
- Tinfoil
- White Paper
- Paper Punch (Small Circle) or Pin
- Tape
How To:
- Okay, to start I have to say please don’t look at the sun. I am sure you know this, but please reiterate it with your kids too.
- Check out this link for a picture of how I made my viewer. All you need to do is follow that picture. I made a few changes to mine that I will talk about below.
- Instead of poking a hole in the tinfoil with a pin, I used a circular paper punch. When I first did it with the pin the image projected on the other side of the box was super small and I am sure it would be very difficult to see the tiny shadow of Venus as it crosses in front of the Sun. The hole that I now punched is about 5/8″ wide. You can see from the photo below how big the image of the sun will be tomorrow around the time of the Transit of Venus where I live.
- I taped my tinfoil piece on using painters tape so that I can remove the tinfoil and make a new piece with a different sized hole if I need to. I didn’t want to have to deconstruct the whole box for this to happen. I am hoping to save the box for the next solar eclipse and maybe I will need a smaller hole.
- I also thought from all the instructions I viewed on the internet that you would put your eye right up to the hole and peer in at the projected image of the Sun. Okay, that might make me sound stupid, because it only took one look with my eye right up to the hole in the box with the super bright pinpoint image on that white paper to know that wasn’t a smart idea. So keep your face a short distance from the hole on the side of the box and position the project image so you can view it without sticking your eye right up to the hole. You can see the projected Sun image in my picture below and I didn’t put the camera very close to the hole.
- Use two layers of Duct Tape and tape over any cracks in your box to make it completely dark inside.
- If you want to make the paper box top lid viewer read below.

How To | Box Top Lid Pinhole Viewer
- Use a large piece of cardboard, I used a the lid to a box of paper. Cut a 5/8″ hole in the center of the lid using a craft knife. Cut the hole as perfectly circular as you can. That determines what shape your projected Sun image will be. I like mine to be as round as possible

- Yup, you are pretty much done now. Look at my picture above for how I projected the image of the Sun onto a white piece of paper. Should be pretty easy for a small child to look at an Eclipse or the Transit of Venus with you.

If you are looking for a recently revised book with the latest information about the planets, I recently ordered this great book from Amazon. This is the most current book I could find. You might want to check it out if you have a budding astronomer like me! The book is called 13 Planets: The Latest View of the Solar System by David Aguilar.
By Alanna George, on May 22nd, 2012 
I had to share a picture of what my daughter made for me for Mother’s Day. You might already know that I really like Bluebirds. She sewed me a stuffed Bluebird softie for me to keep. Isn’t that so sweet. I love it!
How To | Sew a Softie
Supplies:
- Muslin
- Felt
- Pencil
- Sewing Straight Pins
- Fabric Markers
- Fabric Scissors
- Needle
- Embroidery Thread
- Poly-fil Stuffing
How To:
- Carefully draw your design in pencil on your piece of muslin.
- Use fabric markers to color in your design.
- Pin your piece of muslin to a coordinating piece of felt.
- Cut out around your drawing, cutting through the muslin and felt at the same time.
- Keep your pieces pinned together.
- Thread your needle with embroidery floss and sew a whip stitch around your softie. Leave an opening so you can fill it with stuffing. Remove pins as you go.
- When you are almost done sewing, stuff it with stuffing. Continue sewing the rest of the softie closed. Trim thread.
- Wrap in pretty paper and give to a friend or your mom!
By Alanna George, on May 15th, 2012 
The end of the school year is right around the corner. I have been thinking about what to make for L’s teacher. I decided some handmade fabric flowers would be nice. I decided to do them in a neutral color scheme, I know she wears a lot of black. I found the popular stretchy style headband at the Dollar Tree in a pack of 6 for $1. When I made the fabric flowers I put a hair clip and a pin on the back. I figure she can wear it in her hair by attaching it to the headband or using the hair clip. She can also use the pin to put it on a hat, her shirt or even a purse.

I have detailed instructions for making these flowers on a previous post. You can find the instructions here and more here. When I made the flowers in the instruction post I used a satin fabric and made the flowers look a little more loose and I sewed pearls in the center. For the flowers above I used a cotton, quilting type of fabric and wrapped the fabric a little tighter. I also rolled the center instead of tying a knot, which gave the flowers a little bit of a different look. The fabric I used is by Riley Blake Designs and it has glitter already on the fabric, which gave these flowers a pretty shine when they were finished.
I think any teacher would love to receive a handmade gift like this. What are you making for teacher gifts? I would love to hear about it, leave a comment below.
By Alanna George, on May 10th, 2012 
In honor of Mother’s Day I reached way back into the depths of my brain and thought of a craft my mom taught me to make. It is a super simple craft, but as a child I always got a kick out of creating these kazoos with a toilet paper tube. My kids were pretty amazed to realize it sounds just like a kazoo. You can get just a little creative (like my kids) or go crazy and glue on gems and add stickers if your kids are in the mood.
Next week I will feature another craft I used to make with my mom. Of course it is another craft that recycles items you already have at home. Funny, back in the day that was how crafts were made. I don’t remember my mom ever buying anything to make a craft, you just used what you had. Did the word “recycling” even exist 30 years ago? Hmm, food for thought.
Supplies:
- Toilet Paper Tube
- Wax Paper
- Rubber Band
- Markers or Crayons
- Scissors
How To:
- Decorate your toilet paper tube using crayons or markers. Get really funky and glue on gems or use stickers.
- Cut out a square of wax paper that measures 5″x5″. Lay the square over one end of the toilet paper tube and smooth the edges down around the tube. Add the rubber band over top of the wax paper to hold it on the toilet paper tube.
- Make a humming sound into the open end of the tube. See your kazoo is working already!
|
 I was a Design Manager in the scrapbooking industry until the birth of my first child. I then turned freelance designer, crafter and stay-at-home mom. I reside in MI with my husband and our four kids. Find out more about me here.
|


Follow Me