Jesse Tree Activity 
A great Advent Activity for your family! Order my Jesse Tree Ornament Tutorial today and create your own holiday tradition. Find out more here.
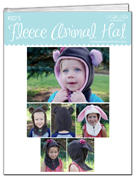
Sew this hood style animal hat to keep your child warm this winter. Purchase pattern here.
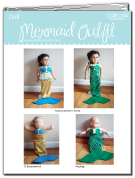
Easy to make mermaid costume pattern for American Girl Dolls or 15" Bamboletta. Purchase pattern here.
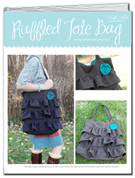
Sew this beautiful ruffled tote bag for yourself or a friend. It's sure to bring compliments. Purchase pattern here. |
By Alanna George, on May 1st, 2012 
I’ve had this idea for using a handprint to make a bird kickin’ around in my head for awhile. I finally pulled out all the supplies to make this project with the kids yesterday. The kids love getting their hand painted and seeing their freshly made print on a piece of paper. Even Calista sort of cooperated, it’s hard to hold her little fingers together to make a good print.
We are giving our cards to Grandma for Mother’s Day. On the inside I am thinking of writing something like this:
I love you,
You love me,
I’ll always be your little chickadee.
Happy Mother’s Day
****************************************************************************
(Keep up to date by following The Craft Nest on Facebook – click here or follow me on Google+ click here.)
Supplies:
- Paper
- Acrylic Paint (Bird Color and Yellow for Beak)
- Paint Brush
- Paper Plate
- Googly Eye
- Glue
- Paper Lunch Bag
- Scissors
- Diaper Wipes
How To:
- Have your card all ready and lay it off to the side. Squirt some paint on a paper plate. Use your paintbrush to paint your child’s hand with acrylic paint. Hold their hand and press it in place on the front of the card. Slowly remove their hand. Use a diaper wipe if you have a small child and need to get the paint off their hand quickly!
- Paint your child’s pointer finger with yellow paint and have them make a finger print for the beak. Let the card dry.
- Use a paper lunch bag and cut out small strips of paper for the nest. My kids used a deckle edge craft scissors to cut out their nest pieces.
- Use school glue and glue on your paper nest pieces. Let dry.
- Use glue to add a googly eye to your bird.
- Write a sweet message inside.
By Alanna George, on April 25th, 2012 
Are you a craft blogger? If so I would love for you to be involved in my Summer Day Camp craft series as a Camp Instructor. I am looking for some bloggers who want to join in on the fun!
Want to know what you need to do to become one of the Camp Instructors? Well, here’s the scoop:
I am looking for day camp style craft projects for kids. Each Camp Instructor can submit one or more projects. Depending on the number of submissions, the Summer Day Camp series will run over a period of 6-8 weeks in the middle of the summer. Probably from mid-June to mid-August. If your project is selected then you will prepare your project, photograph it and write instructions for your camp project. When it gets close to the date your project will be published on your blog, you will email all the Camp Instructors your project photograph with a link to your blog post for the camp project. All Camp Instructors will post your project picture on the designated day and link it to your blog so their readers become your readers for the day!
To join the fun please:
1. Email me with your name and blog url.
2. Tell me a little about your day camp project idea. (Only projects that have not been previously blogged.)
3. Please contact me by May 25th via email at: alannageorge(at)alannageorge.com
That’s it!
I am super excited to get this idea up and running! I hope you will join me and become a Camp Instructor.
By Alanna George, on April 24th, 2012 
Did I tell all of you that I got an iPad for Christmas? Lucky girl, right? I have been searching for the perfect case for it and came across a great tutorial for sewing your own laptop sleeve. You can check out the tutorial here, it is part of Skip to My Lou’s Bake, Craft & Sew Along series. I found the directions easy to follow, putting in a zipper is the hardest part; eeks, I am not good at that!

I made a couple changes to my iPad case, so it differs a little from the tutorial. The three changes I made were using quilt batting instead of fusible fleece for padding, adding pockets inside and putting a ruffle on the outside.
For the padding between my outside and inner lining I used quilt batting instead of fusible fleece. I didn’t want to have to buy anything else, “use what you got” is what I told myself. To use the quilt batting instead of the fusible fleece, I cut the batting exactly the same size as my outer and inner fabrics. When I sewed the zipper to my outer fabric I just sewed the batting as well, as if the outer layer and batting were just one piece.
For my pockets I cut the size of pockets I wanted out of coordinating inner material and sewed them onto one of the inside piece before doing any other sewing on the inside liner fabric. Because I added two pockets inside (one for my charger and one for my stylus) I took that into account when following the directions on measuring around my iPad for determining what size fabric to cut. I knew I wanted enough space in the bag to hold my charger, so I laid the charger on top of my iPad and added that into the measurement.
To add a ruffle to your bag, follow all the instructions up to the point where the tutorial tells you how to embellish one of your outside pieces. Cut a strip of fabric for your ruffle, I made mine twice the width of my bag and about 4 inches tall. Next fold over each long edge and sew along it to create a finished edge. Set your machine on a basting stitch (the biggest stitch it can make) and sew across the long way down the center of the ruffle strip. Next pull one of the threads on each side to gather the strip and make it look ruffled. Pull and gather until the width of the ruffle is the same width as the outside piece. Match the edges of the ruffle with the edges of the outside fabric piece. Pin the ruffle in place along the front outside of the fabric piece. Then sew with a regular stitch down the center of the ruffle attaching it to the outside piece, (you will be sewing over your original basting stitch and through the one layer of outside fabric and fusible fleece/batting.) Follow the rest of the directions in the tutorial.
I love the way my case turned out. It even matches a ruffle tote bag I made. I hope to have that up as a pattern soon!
If you make a computer case I would love to see it, so leave me a comment with a link so we can all check out your handiwork.
By Alanna George, on April 20th, 2012 
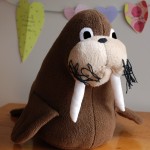
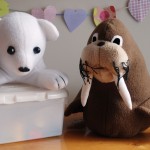
Meet Frosty the Polar Bear and Jellyfish the Walrus! My older son has been asking for a walrus stuffed animal for about a year now. I have been keeping my eyes open for a stuffed walrus, but this seems to fall on the odd side of stuffed animals that you can purchase. I am sure you can find one somewhere for a good sum of money, but that wasn’t in my price range. While searching for a pattern to make a stuffed horse I happened upon this fantastic book called Wild and Wonderful Fleece Animals by Linda Carr. It showed a fleece stuffed walrus on the front cover and it also had a stuffed horse pattern! I made both the walrus and the polar bear from this book. The patterns (included with the book) are pretty simple and even a beginning sewer could make most of the items in the book. My son was completely thrilled to have his walrus (I wanted to save it for a birthday present, but I just had to give it to him). Jellyfish has become one of his favorite stuffed animals.
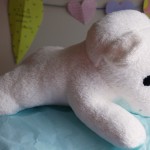
After sewing the walrus I decided to try the polar bear. Once I finished it my younger son laid claim to it, it was supposed to be a baby gift. So I had to sew another one, I actually sewed two more to give as baby gifts. The first polar bear I sewed using regular fleece. The second two I made using more of a fluffy cuddle fleece (found at Jo-Ann’s). I also modified the directions a little for the ones I made for baby gifts. I didn’t add the embroidery floss to the paws and I made the eyes out of black felt and sewed them on using a blanket stitch. I wanted to make sure they were safe for small hands and mouths and didn’t present any sort of choking hazard.
I have to tell you that this book offers a wide range of animals that you could sew for a variety of ages to give as gifts! Click on the link at the bottom of the post and go to the Look Inside! feature to see more of the animal patterns that you receive with the book. I’ve got my eye on the penguin and porcupine as animals I would like to try next.
-
-
Jellyfish the Walrus
-

-
Frosty the Polar Bear
-
-
Frosty sideview
-
-
Best friends Frosty and Jellyfish
By Alanna George, on April 10th, 2012 
Last week over Spring Break I decided to try to save some money and take the birthday pictures of my kids myself instead of going to a studio. Things went pretty good when snapping the individual pictures, but put these silly kiddles all together and try to snap a shot and they turn into a bunch of goofs. I think this photo will be one I look back on and laugh fondly as I can see each of their personalities reflected in their silly gestures.
What do your kids do when you try and take their picture?
I just have to share a couple more. Every time I look at this pic of my boys I laugh seriously hard. I was barking out orders of how to sit and how to smile and this is what they looked like by the end… I remember telling Charlie to look up slightly and telling Allan to smile a little more.

Then there are my girls. For some reason whenever they start laughing together they always look at one another. This picture is really just too sweet for words. One of Calista’s first words was Lorelei. When Lorelei gets home from school Calista runs to her and they hug.

Hope all of you are having a good week!
By Alanna George, on April 4th, 2012 
It’s Spring Break at our house. We are keeping busy enjoying the fabulous spring weather! I just wanted to hop on the blog and show all of you the cute bunnies we made from toilet paper tubes and cotton balls. Aren’t they cute? The perfect Easter craft for little kids. I had to laugh at how different all three turned out. The boys didn’t want feet on theirs and my daughter wanted feet and floppy ears so the bunny could hide.
How To | Toilet Paper Tube Easter Bunny
Supplies:
- Toilet Paper Tube
- Cotton Balls
- Googly Eyes
- Pink Paper
- White Paper
- School Glue
How To:
- Use the white paper to cut out bunny ears and feet. Use the pink paper to cut out the inside of the ears and a pink bunny nose.
- Add glue to the toilet paper tube and press cotton balls onto the glue as you go until the entire tube is covered.
- Glue on the googly eyes and the nose.
- Glue on the ears and the feet.
- Let dry.
By Alanna George, on March 28th, 2012 
Recently I received a My Own Story Time Pad from Leap Frog to review. My son Charlie just turned 3 and was so excited to play with it. First thing I did was hook it up to the computer and sync with the Leap Frog Learning Path. If you don’t already have the Leap Frog Connect software on your computer, their site will lead you through the download and then you will be ready to personalize some of the features on the My Own Story Time Pad. You can personalize the My Own Story Time Pad with your child’s name, that is a big hit with my son. When Scout the dog talks he says my son’s name, how cool is that. When my son pushes the letter C it says, “That’s the first letter of your name, Charlie. Let’s celebrate your letter.” The screen shows his name and then Scout the dog does a short dance to music.
 The most favorite button for my son to push is the email button. I personalized it so he receives emails from Mom, Dad, and his Uncle, plus it comes with an email from Scout. He laughs every time he hears the Story Time Pad read his emails to him. The most favorite button for my son to push is the email button. I personalized it so he receives emails from Mom, Dad, and his Uncle, plus it comes with an email from Scout. He laughs every time he hears the Story Time Pad read his emails to him.
Another feature he adores is the music button. One of the songs spell out his name. I was able to choose other songs from a list when I was in the Learning Path. So ours sings a number song, the alphabet song, The Itsy Bitsy Spider, If You’re Happy and You Know It and more. In this setting he can also make his own music by pressing the letters of the alphabet. All the letters make different and sometimes funny sounds. The letter “A” makes a donkey noise, it gets a big laugh by all my kids every time they press it.
Here is what the Leap Frog site says the My Own Story Time Pad teaches:
- The Alphabet – Children who can recognize letters with confidence have an easier time learning letter sounds and word spellings.
- Storytelling – Children learn the patterns of oral language and stories by listening to and repeating what they hear and read.
- Phonics skills – To read independently, children must understand the relationship between the sounds in spoken words and the letters that represent those sounds.
- Pretend Play – Pretend play offers a creative outlet that strengthens a child’s understanding of the world as he acts out stories he knows and situations he observes in the adult world. As imagination grows, dramatic play becomes more complex.
- This has been a great learning tool at our house. Even my older kids, ages 5 and 7, like to play with it. The only negative thing I have to say about it, is that the graphics on the screen can be a little difficult to see. For the price, around $29.99, it is a steal for all the learning tools and interactive personalization features you get. This would make a fantastic gift, especially for a younger child whose older siblings have a LeapPad or Leapster. (My son thinks this is his own LeapPad like the big kids have.) If you want to learn more about the My Own Story Time Pad from Leap Frog click here to go to their website.
- *No monetary compensation was given for this review. I have written my honest opinion about this product. Please visit Leap Frog to find out more about their products.
By Alanna George, on March 27th, 2012 
This is the birthday girl on her 7th birthday. She was so excited to have a bunny themed birthday party. At this time of year it isn’t too hard to come up with bunny items to buy to add the perfect touches for a bunny party.

Food:
For the food I tried to stick with the bunny theme and serve vegetable based items. We had carrots, cherry tomatoes and celery (ants on a log). For the main course we had vegetable soup and salad.

Drink:
For our drink we had a special berry lemonade with frozen raspberries that we dropped in the drink to keep it cold. The kids loved this “special” drink. Another option would be to offer carrot juice or vegetable juice, I didn’t think my kids would go for it.

Dessert:
A bunny themed party requires a bunny cake. To make the cake I used a box mix and baked 2 – 9″ cakes. For the head part of the cake I cut some small sections off to form it into more of an oval shape. I used the other cake and cut out two ears from it. I then frosted the cake using white frosting. Then I colored the remaining frosting pink using a couple drops of red food coloring. I then frosted the inside section of the ears using the pink frosting. Next, I added coconut to the cake, but I skipped the pink ear part. I made the eyes out of chocolate and the nose from a jelly bean. The birthday girl was in love with her bunny cake!

Decorations:
To decorate for the party I made tissue paper fans with bunny heads. To learn how to create your own tissue paper bunny fans click here. I also bought a bunny themed table cloth, some solid color balloons and a bunny chair cover from Dollar Tree. I also made glittered bunnies using some plaster bunnies I bought from the Target dollar bins (hopefully I will have a How To for these soon).
 
Games and Activities:
1. To keep busy during your bunny party you can play pin the nose on the bunny. I used the bunny head shape from the tissue paper fans (free download in that post) as a head we could pin noses on. My son helped me cut out pink bunny noses from construction paper. All we needed to finish up was a blindfold and some tape.
2. You can also buy bunny Peeps for everyone to eat and for an activity have them dip them in chocolate fondue. Warning – little kids get chocolate everywhere and laugh a lot while dipping everything, including their fingers in the chocolate.

Party Favors:
As a party favor to give to your guests you can make a small jar of bunny noses using jelly beans and baby food jars. To read more about how to create your own bunny noses and get my free label download click here.

Invitations:
Don’t forget that you can download these free invitations to send out for your party by clicking here.

Handmade Gift:
If you are looking to make a special bunny themed gift for the birthday girl follow this link to download the pattern for this bunny pillow. The original instructions are for making this bunny using felt and a sewing it using the blanket stitch. If you want to sew the bunny using fleece, make sure to add a half inch all around the pattern as you cut out your fabric.
The day of our bunny party was beautiful and we were lucky that the kids could all go outside and play for awhile during the party!
By Alanna George, on March 20th, 2012 
Remember before when I said I am not in love with baking? Well, I am still not, but I put in a good effort to make some cute cupcakes for L to take to school for her birthday, staying with her bunny theme of course. After a week of the older 3 getting strep throat and the baby getting a double ear infection I was pretty tired out from all the coughing and the lack of sleep. We had L’s birthday celebration on Sunday and then on Monday I made cupcakes for her to take to school on Tuesday. Do you ever get in the middle of a project and think, “What am I doing this for?” That is the mental state I was in while I was decorating these on Monday. In the end though, she was super excited to get home from school and see how cute they turned out. The next day after school she told me all the kids said the cupcakes were the “best ever”. (Really? It’s just a box mix. Add enough marshmallows to a cupcake and I guess they become awesome.) If you have to indulge your daughter with bunny theme cupcakes you may want to follow the directions below.
Supplies:
- Cake Mix
- Frosting
- Green Food Coloring
- Cupcake Liners
- Large Marshmallows
- Small Marshmallows
- Edible Easter Grass
- Wilton Candy Eyeballs
- Wilton Sugar Sheet White
- Food Scissors
How To:
- Bake your cupcakes according to mix directions.
- Add green food coloring to frosting until you get the desired green color. Frost cupcakes with green frosting.
- Cut the large marshmallows in half using a food scissors. Place them onto the cupcakes.
- Add a small marshmallow to one end of each large marshmallow.
- Cut off short chunks of edible Easter grass and place around the bunny body.
- Cut bunny shaped head from the Wilton sugar sheet. (My head was a semi-circle with ears.) Place head in front of bunny body.
- Add two candy eyeballs to the front of the head, push them down into the frosting so they appear to be peeking out.
- * Here is an important tip about the sugar sheet bunny heads, do not cover your cupcakes! The moisture with cause the sugar sheet to become soft and the ears will flop over. If that happens just make sure the ears flop back onto the body, it will still look like the bunny is hiding and playing peek-a-boo. Another option is to leave the heads off until closer to the time they will be eaten and then add them (they will probably be brittle if you have left them uncovered). I prepared mine the evening ahead because we had to head to school right away in the morning and some of mine flopped backward.
By Alanna George, on March 15th, 2012 
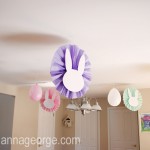
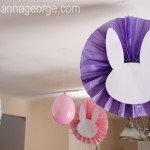
The best part of a birthday party surprise is planning the decorations. As I said in a previous post I do all my decorating when my kids are asleep, so the decorations have to be simple to hang up. My daughter was in love when she came downstairs on the morning of her birthday and saw these lovely tissue paper bunny fans hanging from the ceiling. Want to know how to make your own? Just follow the instructions below.

How To | Tissue Paper Party Decorations
Supplies:
- Assorted Colors of Tissue Paper (I bought a pastel pack from Dollar Tree)
- Embroidery Floss
- 11×17 White Paper
- Scissors
- Double-sided Tape
- Tissue Paper Bunny Head Download
- Hot Glue Gun and Glue Sticks
How To:
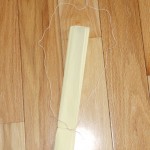
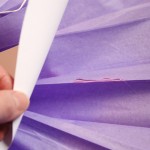
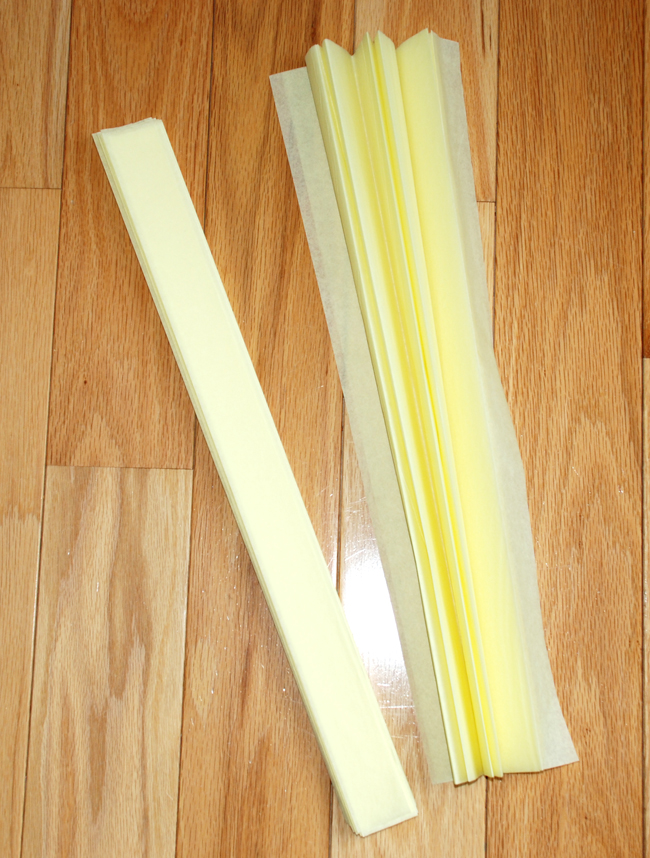
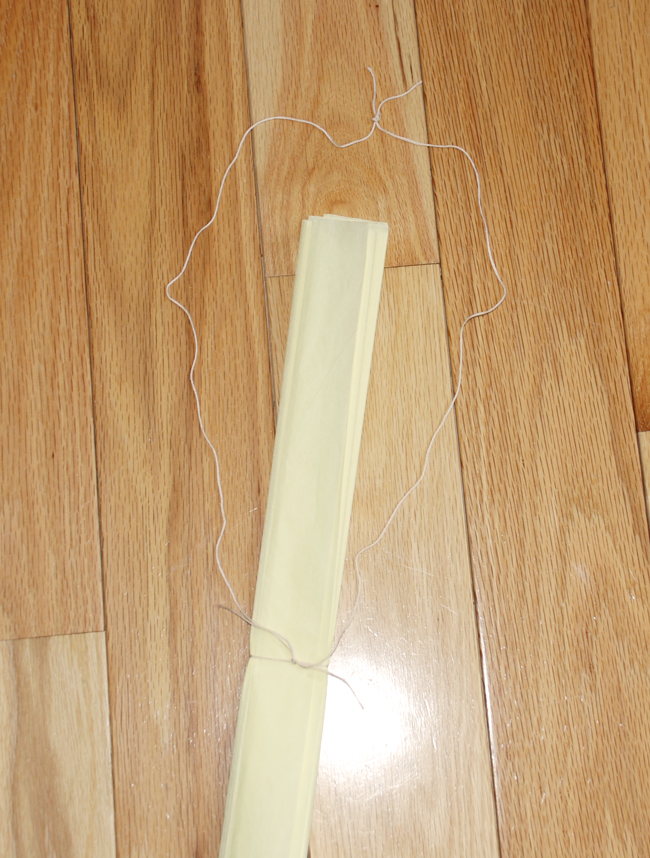
- You need four pieces of tissue paper to create one fan. Use two pieces together and fold them using an accordion fold. Fold the second two pieces together using an accordion fold.
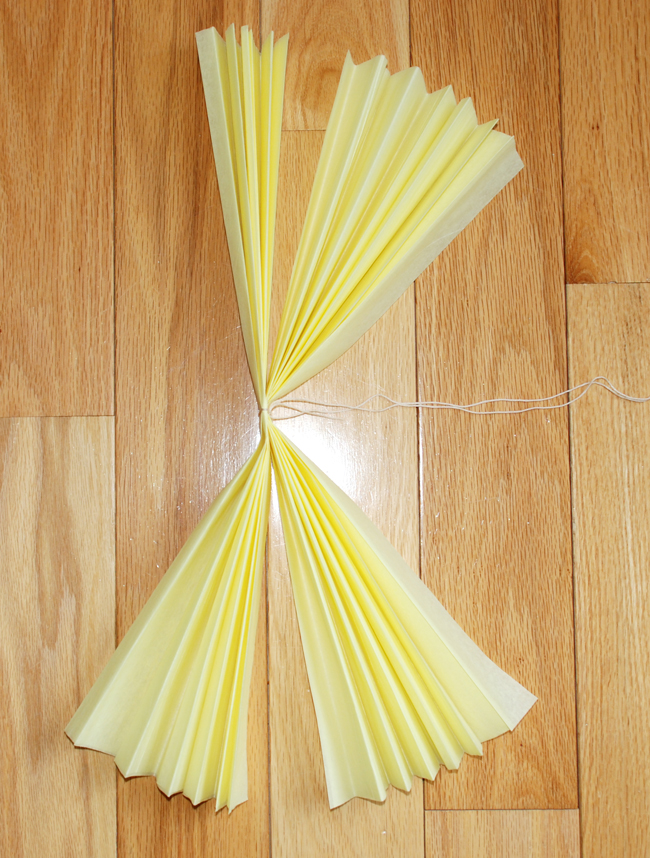
- Tie both sets of folded tissue paper together in the center using embroidery floss. Leave two long tails of floss and tie them together at the top. The tissue paper will attach together inside of this open loop and will be used to hang the fans.
- You will have four different sections of tissue paper.
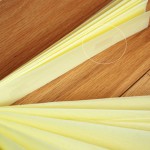
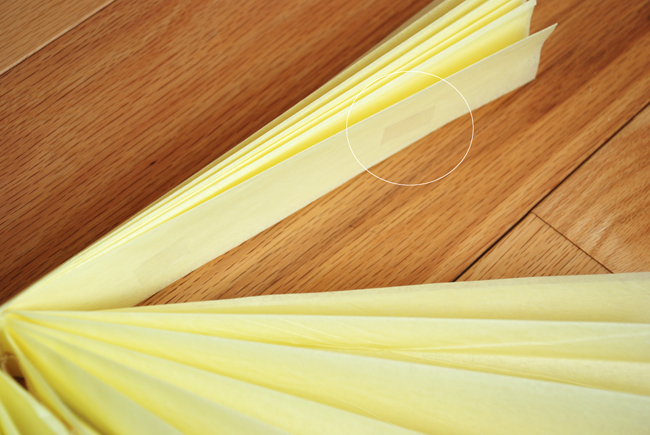
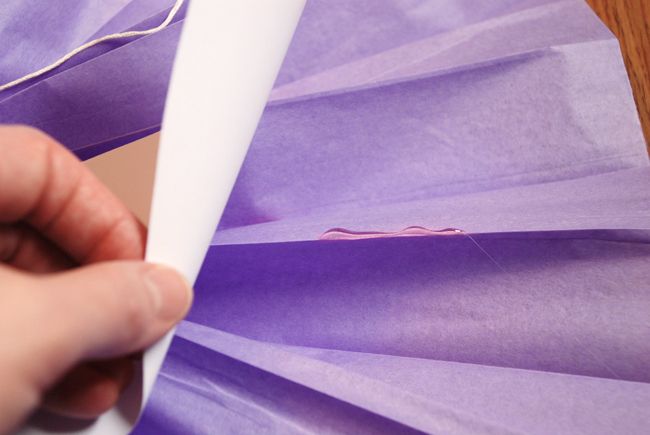
- Use pieces of double-sided tape to tape the sections together.
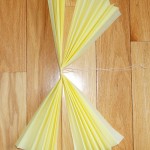
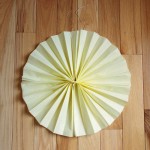
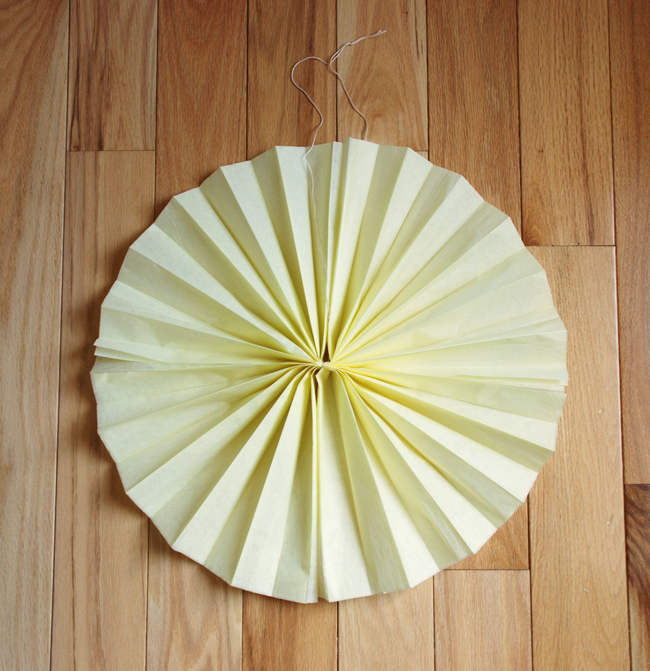
- Once all sections are taped together the fan will be a complete circle.
- Print off one bunny head shape from the file download (Tissue Paper Bunny Head). Use the one as a template to cut out multiple bunny heads. I like to staple multiple pieces of paper together and then cut them all out at once.
- Using a hot glue gun, glue the bunny heads onto the tissue paper fans. Put a bunny head on each side.
- Use the long thread to tape the tissue paper fans to the ceiling.
-
-
Step 1
-
-
Step 2
-
-
Step 3
-
-
Step 4
-
-
Step 5
-
-
Step 7
-
-
Free Download:
Click here – Tissue Paper Bunny Head
*(for personal use only)
|
 I was a Design Manager in the scrapbooking industry until the birth of my first child. I then turned freelance designer, crafter and stay-at-home mom. I reside in MI with my husband and our four kids. Find out more about me here.
|


Follow Me