Jesse Tree Activity 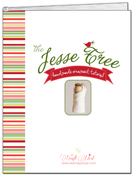
A great Advent Activity for your family! Order my Jesse Tree Ornament Tutorial today and create your own holiday tradition. Find out more here.
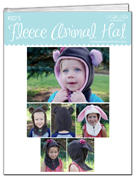
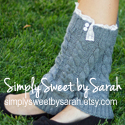
Sew this hood style animal hat to keep your child warm this winter. Purchase pattern here.
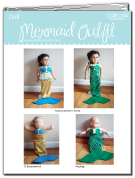
Easy to make mermaid costume pattern for American Girl Dolls or 15" Bamboletta. Purchase pattern here.
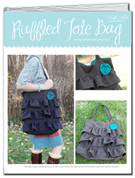
Sew this beautiful ruffled tote bag for yourself or a friend. It's sure to bring compliments. Purchase pattern here. |
By Alanna George, on March 13th, 2012 
No party would be complete without a small take home gift for the party attendees. We made jars of bunny noses for my daughter’s friends to take home after her bunny themed birthday party. You can download the bunny noses label for free using the link below.
How To | Bunny Noses Party Favor
Supplies:
How To:
- Print off Bunny Noses Party Favor Labels.
- Cut out labels.
- Use tape to adhere labels to jar.
- Add pink jelly beans.
Free Download:
Click here – Bunny Noses Party Favor Labels
*(labels are for personal use only)
By Alanna George, on March 6th, 2012 
Over the next week I will be posting lots of bunny party theme ideas. My daughter is having a birthday this weekend and she loves bunnies, so guess what the theme is going to be? To invite her friends we made these bunny party invitation cards. I love keeping it simple and cute! Click the link below to download your own copy of the bunny invitations. (As always this art is available for personal use only.)

How To | Bunny Theme Party Invitations
Supplies:
- Paper
- Printer
- Free Bunny Invitation Download
- Ribbon
- Glue Dots
- Small White Pom-pom Ball
- Paper Cutter
- Corner Rounder Punch
- A2 Size Envelopes (fits 4.25″ x 5.5″ size card)
How To:
- Print off the Bunny Theme Party Invitation.
- Use a paper cutter to cut the the paper in half (there are two invitations per page). Then fold each invitation in half.
- Fill out the inside of the invitation with the appropriate information.
- Use about 4″ of ribbon and tie a small bow. Adhere the bow to the front of the invitation over the bunny’s ear using a glue dot.
- Use a glue dot to add a small pom-pom ball to the bottom center of the invitation.
- Mail your invitations!
Free Download:
Click here – Bunny Theme Party Invitation
By Alanna George, on March 1st, 2012
I am so excited to introduce all of you to my first blog sponsor Tippy Stockton Jewelry. I first met Patricia (Tippy) at The Creative Connection in 2010 through a mutual friend. We had dinner after our classes and at the time I had no idea that she created fabulous jewelry. Now that I follow Tippy Stockton Jewelry on Facebook I have been drooling over numerous jewelry pieces that she has created over the past year and a half. I am confident that you will love her amazing style as much as I do!
You can read all about Patricia and where she found her inspiration below:
“Some of my earliest memories are of playing with my Mom and Grandmother’s jewelry. Opening up their jewelry boxes, made me giddy with excitement. I still get that same feeling today when I find a piece of Vintage jewelry – that piece of jewelry tells a story and I love giving it new life!”
With a lifelong love of crafts, fashion and everything girly, Patricia’s journey with Tippy Stockton began in 2009 when she launched her website, www.tippystockton.com, shortly after the passing of both her parents. Through her grief, Patricia found her purpose; to be the creative person her Mother always knew she could be. With a background in Interior Design, Industrial/Product Design and Graphic Design, designing jewelry has been an outlet that combines all elements of design.
Patricia has created a full line of jewelry that women of all ages will find versatile and easy to wear for casual or formal occasions. Many of her pieces are Vintage – from a small bead, to a length of Vintage brass chain, bringing in those rich elements and textures from days gone by will hopefully bring joy and inspire people to reflect on their own history. She also loves that each piece of jewelry is handmade and proudly made in America.
Patricia lives in Edmonds, Washington, (a small suburb of Seattle) with her husband John, son Kellan, and her constant Studio companion, Chloe. On any given day you’ll find her hard at work in her garden Studio perched among the tall cedars and lilacs.
See Patricia’s work as featured in the September/October issue of 425 Magazine, Matthew Mead’s HOLIDAY Magazine in October 2010, and Where Women Cook – CELEBRATE!
To celebrate our new partnership Patricia is generously offering 20% off your purchase when you use coupon code TIPPY20. So click on her ad on the right side of the page and head over to her store to see more amazing jewelry!
By Alanna George, on February 28th, 2012 
If you saw my Very Hungry Caterpillar birthday post you were probably wondering how to make your own caterpillar cake. You can follow along with the instructions below. I would rank this cake as easy to make and decorate, but I need to preface this by saying that I have no cake decorating background so my cakes are mediocre at best. Although, my kids think they are the best cakes ever, so that is all that really matters.

How To | The Very Hungry Caterpillar Cake
Supplies:
- Cake Mix
- White Frosting
- Bundt Pan
- Birthday Candles
- Purple Pipe Cleaner
- Sour Patch Kids Candy
- Food Coloring
- Sandwich Baggies
- Large Cutting Board
How To:
- Bake your cake in a Bundt Pan. Remove cake from pan and cut the entire cake in half. On a large cutting board place the ends of the cut cake together in a curvy line.
- Use food coloring to dye 3/4 of the frosting in the container green. Dye a small portion yellow, another small portion black and the remaining frosting red. (I found that the color actually darkened up a bit after sitting, getting that red color takes a lot of dye!)
- Use a bread knife to round off the front and back ends of the cake.
- Next, use some green frosting to “glue” the middle of the cake together. Then frost the green body part of the cake. *Reserve a small amount of green frosting for the eyes.
- Use red frosting to frost the head section.
- Place a small amount of green frosting in a baggie and snip a small hole in the end. Use the frosting to make circular eyes.
- Place the yellow frosting in a baggie and snip a small hole in the end. Use the yellow frosting to create an outline around the green eyes.
- Place the black frosting in a baggie and snip a small hole in the end. Use the black frosting to create a nose on the caterpillar.
- Cut a purple pipe cleaner in half. Bend each piece in half and insert into the top of the caterpillar’s head to create the antennae.
- Decorate the back of the caterpillar with sour patch kids gummy candies.
- Add candles and sing the Happy Birthday song!
By Alanna George, on February 21st, 2012 
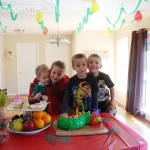
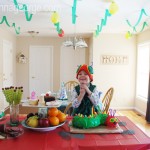
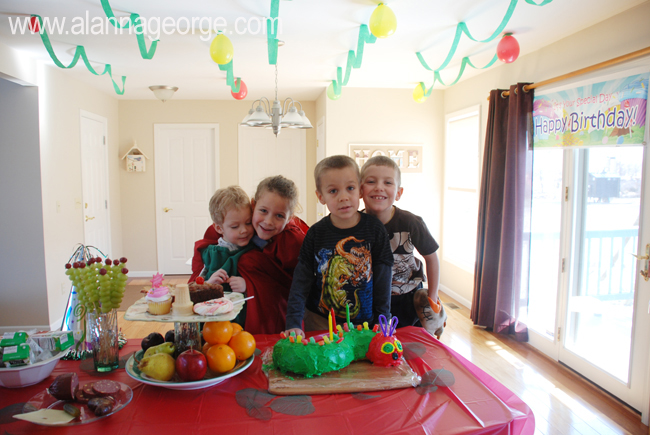
My son who is in love with The Very Hungry Caterpillar by Eric Carle turned 3 recently. He wanted a Very Hungry Caterpillar birthday party, so I was excited to fulfill his wish. Of course any proper party needs appropriate cake, food and decor. I love to make their birthdays really special, but for me it is important not to blow the budget. I also have time constraints, I do all the cake decorating (because it’s a surprise) and room decorating after my kids go to bed (you know, at the point when I just want to crash in the chair and relax). My point being, I am sure I could go a lot crazier with the decor, etc., but my reality is that I have a short time frame to accomplish the wow factor. (If you want to make a Very Hungry Caterpillar costume click here or for the cake instructions click here.)
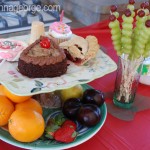
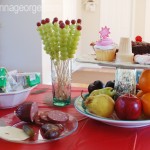
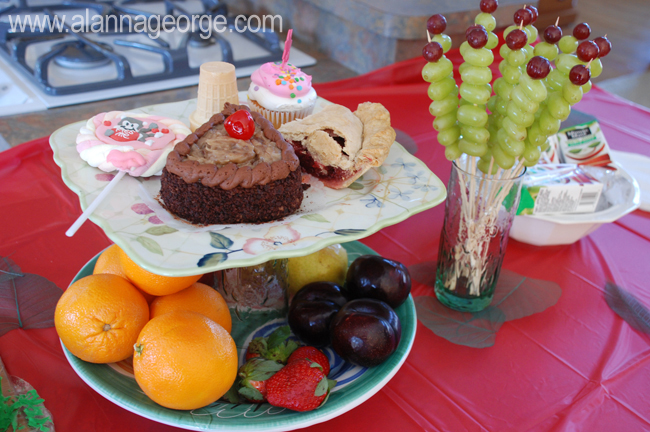
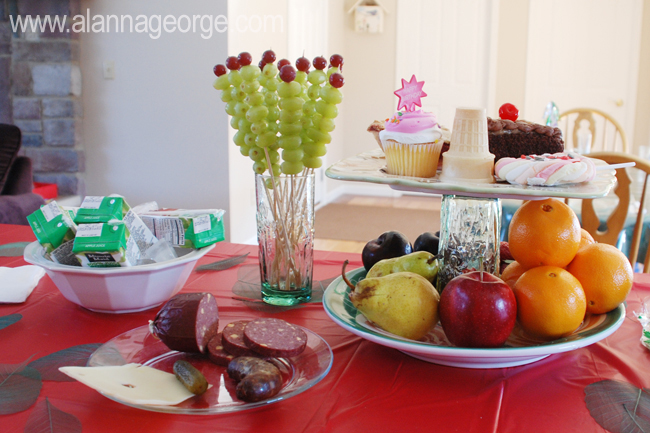
For his birthday party lunch I served all the food The Very Hungry Caterpillar ate in the book. I told all my kids and their guest that they could wear a costume if they wanted. The kids loved having a funny lunch with all sorts of random fruit, food and treats. I also served macaroni and cheese, the birthday boy’s favorite food, as the main course.
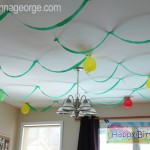
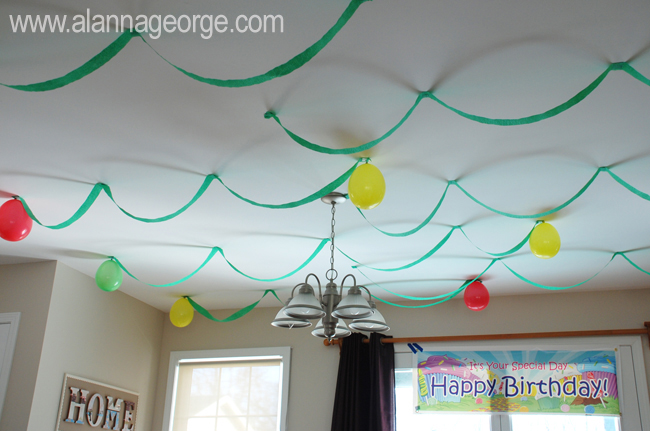
I created my own tiered plate by putting one large plate on the bottom and then turning a tall glass upside down and placing another plate on top. I bought the streamers, balloons, candles and table cloth all at Dollar Tree. At my grocery store the bakery sells single slices of cake, single cupcakes and slices of pie. See below for my decor and grocery shopping checklist.
-
-
Ready to party!
-
-
Food and caterpillar grape kabobs.
-
-
Party food.
-
-
Caterpillar streamers.
-
-
The birthday boy!
Shopping Checklist:
Decor Items -
- Green Streamers
- Assorted Color Balloons (Red, Yellow, Green, Purple)
- Red or Green Table Cloth
- Napkins, Cups, Plates, Plasticware
- Green Leaves
- Gift Bags and Tissue Paper
Decor How To -
- To create caterpillar streamers I cut 7 foot lengths of green streamers. I used pieces of folded over painters tape to attach them to the ceiling. (See pic above.) At the end of the streamers I placed balloons (my balloon multi-pack didn’t have very many red) to represent a caterpillar head.
- I covered the buffet area and table with red and green table cloths and sprinkled around some skeleton leaves from the craft store. (Had it been summer I would have picked green leaves from outside.)
- I also wrapped the gifts in red and green gift bags and stuffed them with yellow, red, green and purple tissue paper.
Grocery Items -
- 1 Apple
- 2 Pears
- 3 Plums
- 4 Strawberries
- 5 Oranges
- Slice of Watermelon
- Piece of Chocolate Cake
- Ice Cream Cone
- Pickle
- Swiss Cheese
- Salami
- Lollipop
- Slice of Cherry Pie
- Sausage
- Cupcake
- Bamboo Skewers
- Red and Green Grapes
- Apple Juice Boxes
Grocery How To -
- Arrange all the items that the caterpillar eats on plates.
- Create caterpillar grape shish kabobs by adding a bunch of green grapes and then a red grape for the head.
- Have red and green colored apple juice boxes available for drinks.
By Alanna George, on February 13th, 2012 
You can recycle old scraps of felted sweaters and fleece to create your own unique felt heart pin for Valentine’s Day. (Do you recognize the Lava Girl hot pink felt on the back?) Over the weekend I started sewing the pin on the left, once my daughter saw what I was making she wanted to make one too. I tried to insist that she had to sew her heart using a different stitch because the blanket stitch would be too hard for her. She begged until I gave in and taught her the stitch, then she stitched her heart on pretty much perfect all by herself. Guess mom isn’t so smart. Tomorrow we will be wearing these all day to celebrate Valentine’s Day. Make one of these for your daughter, teacher or babysitter. They will look lovely on your shirt tomorrow!
How To | Felt Heart Pin
Supplies:
- Felt Scraps
- Fleece Scraps
- Embroidery Thread
- Sewing Needle
- Straight Pin
- Poly-fil or Wool Stuffing
- Bar Pin
- Fabric Scissors
- Stick-on Gems
How To:
- Cut out a square shape from your felt. (I have some Fiskars scalloped edge fabric scissors I used to cut the edges of my squares.)
- Cut out a heart shape from felt or fleece. Pin in place onto the felt square.
- Using a blanket stitch (click here for a how to) sew almost all the way around the heart. Leave a small opening for stuffing.
- Stuff the heart with a small amount of stuffing, then continue sewing the heart onto the felt square.
- Stitch words or a design in the center of your heart or add gemstones.
- Sew the pin bar to the back of the felt square.
 Back side of felt pin.
By Alanna George, on February 8th, 2012 
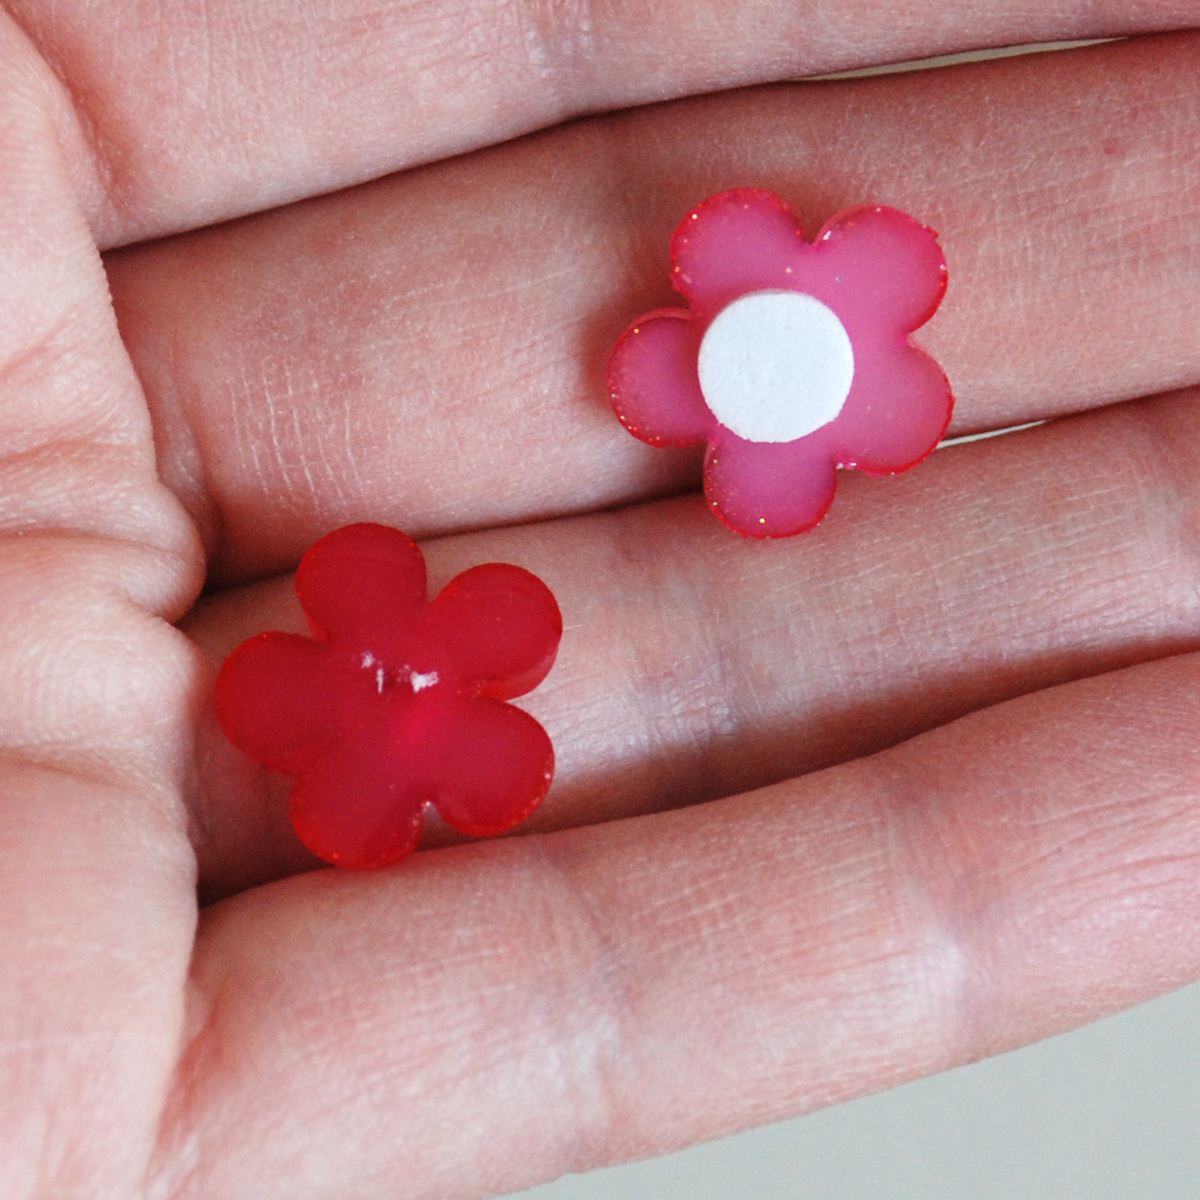
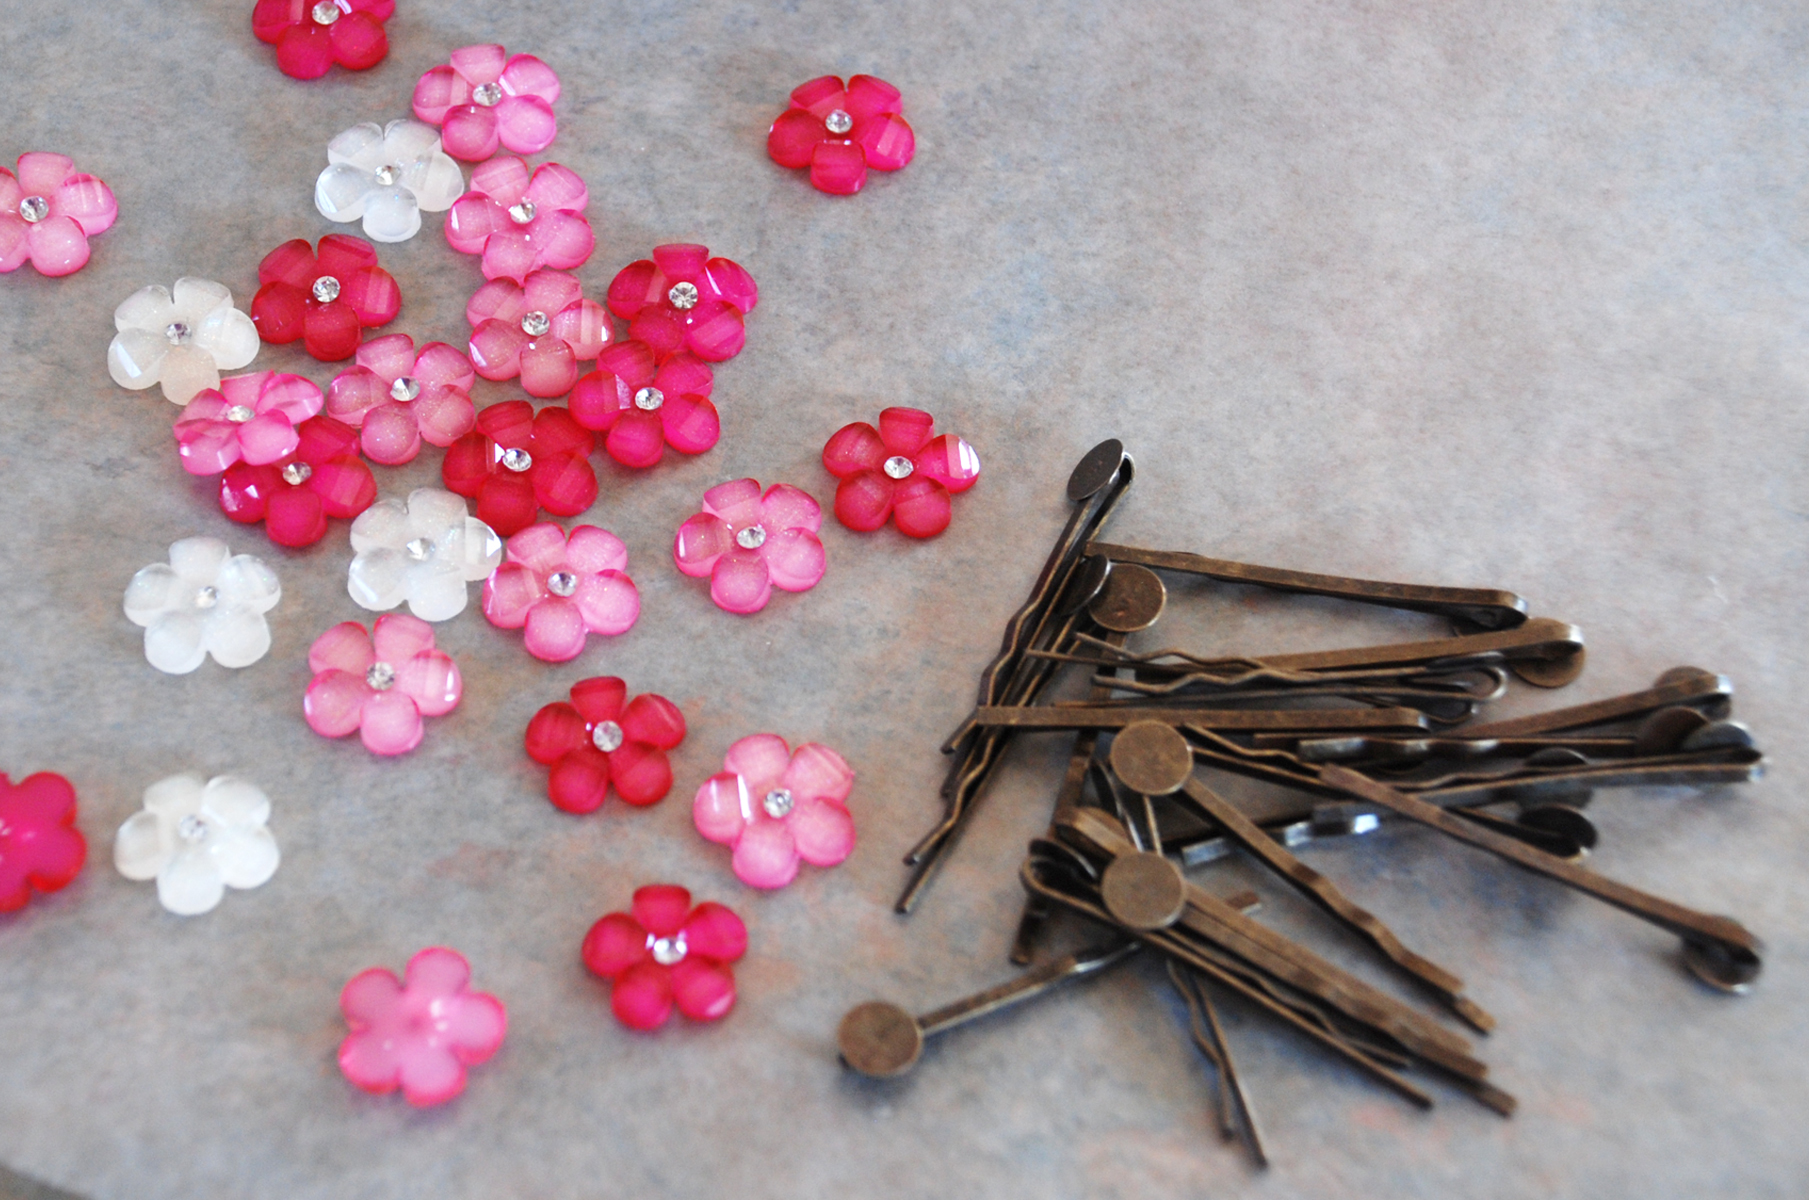
Beautiful aren’t they? So easy to make too! You only need three supplies to make these stunning bobby pins. My daughter wore some in her hair today to school and they looked really cute. Girls of all ages will love keeping their hair in place with these! These would make great handmade gifts for bridesmaids, birthday party favors or a gift for your sister.
I previously posted these instructions in with my Valentine Printable, so this is a little redundant. I thought these pretty pictures might inspire some of you to make just the bobby pins even if you don’t need to create Valentine cards.
How To | Cabochon Bobby Pins
Supplies:
- Bobby Pins with Pad (mine are from here)
- Cabochon Flowers (mine are Martha Stewart from Jo-Anns)
- E6000 Glue
How To:
- Put glue (E6000) on the bobby pin pad.
- Add flower or cabochon. (The Martha Stewart ones I used have a foam sticker on the back. I peeled the foam off and then had a flat surface left for gluing.)
- Let dry.
By Alanna George, on February 1st, 2012 
Shhh, I don’t want to give away the surprise, but we made this Valentine gift for my husband. I am pretty sure he will find the perfect spot on his desk at work to display this little piece of artwork. What could be cuter than hearts made from tiny fingerprints? This was such an easy project to make. You should get some supplies and whip one up too!
How To | Fingerprint Heart Canvas
Supplies:
- 3.5″ x 2.5″ Canvas (I found mine at Jo-Ann’s for $1.99)
- Mini Art Easel (Jo-Ann’s)
- Acrylic Paint or Stamp Pad
- Rub-on Letters (Mine are Heidi Swapp from Making Memories and may not be available anymore.)
- Paint Brush
- Krylon Clear Acrylic Coating Spray
- Diaper Wipes
- Wax Paper
How To:
- Choose the colors of acrylic paint you are going to use and squirt a small amount of each color onto your wax paper. (Or have your stamp pads ready.)
- Use a paintbrush to paint the tip of your child’s pointer finger. Have them hold their finger straight and lift the canvas to their finger. Press their finger onto the canvas at a slight angle. That is the first half of the heart.
- Paint the tip of your child’s finger again and repeat the above step but angle their finger the other way to create the second half of the heart. Use a diaper wipe to quickly and easily clean off your child’s finger.
- Repeat above steps to create multiple fingerprint hearts. Let dry.
- Use rub-on letters or a marker to write a message under the heart fingerprints.
- Spray your canvas with an Acrylic Sealer to protect the artwork and the writing.
- On the back of the canvas write the date and name of each child and the placement of their fingerprint.
By Alanna George, on January 26th, 2012 
I drew up these fun cartoon-ish looking faces to use on our Valentine’s cards this year. I have the free download below if you want to use them for your cards too. Super cute, but there is a little assembly required! The recipients are gonna love them though. (Please remember this art is available for personal use only.)

How To | Silly Face Valentine’s Day Cards
Supplies:
Silly Boy Version -
Boy Version How To:
- Print out Silly Mustache Boy Valentine Card art. Trim to size. (I printed the words directly on the back side of the card. I did not make mine a folding card.)
- Print out Mustache Art. Cut mustaches out of black paper. (I used my Silhouette (in Illustrator) to cut out the mustaches.)
- Glue googly eyes in the correct spot on the cards.
- Put a small piece of tape on the boy face under the nose. Then adhere the mustache on top of the tape using a glue dot. This will allow the mustache to be removed later without tearing the card.
- Insert Boy Valentine’s Card into envelope and add a Popsicle stick inside the envelope too.
- To create a design on your envelope, cut out a heart shape and lay it on your envelope. Use Smooch Spritz and spray your envelope. Lift off the heart and you have a cool heart void left!
- Seal and deliver.
Text on the backside of the Boy Valentine reads: “Valentine, Let’s make silly faces together.” Along the bottom in small print it says, “Use crayons or markers to color the picture on the front. Carefully unstick the mustache from the front and attach it to the enclosed popsicle stick. Hold the mustache in front of your face and make your own silly faces.”
***************************************************************
Supplies:
Beautiful Girl Version -
- Beautiful Girl Valentine Art
- A2 Size Envelopes (fits 4.25″ x 5.5″ size card)
- Smooch Spritz in Cherry Ice by Hampton Arts
- 18mm (or so) Googly Eyes
- Paper Punch
- Glue
- Bobby Pins with Pad (mine are from here)
- Cabochon Flowers (mine are Martha Stewart from Jo-Anns)
- E6000 Glue
- Wax Paper
Girl Version How To:
- Print out Beautiful Girl Valentine Card art. Trim to size. (I printed the words directly on the back side of the card. I did not make mine a folding card.)
- Glue googly eyes in the correct spot on the cards.
- Using your Bobby Pins with pad, glue a cabochon flower onto each pin using E6000. Do all your gluing over wax paper or other disposable surface. E6000 has a tendency to run out of the tube quickly. Set aside and let dry.
- Use a paper puncher to punch a hole in the hair of the girl card. (See pic above for placement.) Insert a bobby pin into the hole.
- Insert Girl Valentine’s Card into envelope.
- To create a design on your envelope, cut out a heart shape and lay it on your envelope. Use Smooch Spritz and spray your envelope. Lift off the heart and you have a cool heart void left!
- Seal and deliver.
Text on the backside of the Girl Valentine reads: “Valentine, Let’s be beautiful together.” Along the bottom in small print it says, “Use crayons or markers to color the picture on the front. Afterward carefully remove the bobby pins from the front and put them in your hair. You look marvelous darling!”
***************************************************************
Free Downloadable Art:
Click Here – Silly Mustache Boy Valentine Card
Click Here – Mustache Art
Click Here – Beautiful Girl Valentine Card
By Alanna George, on January 18th, 2012 
Here is something you can make your little sweetheart for Valentine’s Day, a hand-crank music box placed inside a cute hand-painted wooden box. When my daughter (now 6) was a baby I always sang her “You Are My Sunshine” while I rocked her to sleep. My daughter and I still love to sing this song together. (Have you heard this version by Elizabeth Mitchell?) Below are the instructions for creating your own wooden music box.
(I also wanted to mention that this would be a beautiful way to present an engagement ring.)
How To | My Sunshine Music Box
Supplies:
- Hand Crank Music Box (I found mine here.)
- Wooden Box ($1 at Michaels Craft Stores)
- Paint Stirrer Stick
- Acrylic Paint in White, Light Blue and Yellow
- Acrylic Paint Gloss Sealer (comes in same size bottle as the acrylic paint)
- Paint Brush
- Small Craft Sponge
- Black Stamping Ink Pad
- Small Alphabet Letter Stamps
- 4 Small Screws
- Wood Glue
- Dremel Tool
- Saw
- Sand Paper
How To:
- My music box needed to be attached to a piece of wood and glued into the bottom of the wooden box. I found a paint stick was the perfect width. I had my husband cut the paint stick to the correct length. Then he screwed the music box to the paint stick.
- Next my husband marked where he needed to cut a notch and hole for the music box crank arm to slide down into. He used a dremel tool to cut the opening.
- You will want to paint and embellish your box next and wait until last to glue your music box inside.
- Before painting your box, sand lightly with sand paper. (I didn’t do this and should have in hindsight…)
- Paint the outside of the box with blue acrylic paint. Let dry.
- To create the clouds, lightly dip the corner of a sponge in white paint. Dab in a circular motion creating cloud shapes all around the box. Let dry.
- Paint the heart on the top yellow. Let dry.
- Use your alphabet stamps to add “my sunshine” on top of the yellow heart. Let dry.
- Paint over entire box with the acrylic sealer. Let dry.
- Adhere your paint stick with attached music box to the bottom of your painted box using wood glue.

|
 I was a Design Manager in the scrapbooking industry until the birth of my first child. I then turned freelance designer, crafter and stay-at-home mom. I reside in MI with my husband and our four kids. Find out more about me here.
|


Follow Me