Follow Me

  • 
  • 
  • 
  • 
  • 
  • 
  • 
  • 

Alanna George | The Craft Nest

a craft site for families

  • Home
  • Shop
    • Checkout
  • Craft Projects
    • Birthday Projects
    • Children’s Sewing Projects
    • Christmas Projects
    • Clay Projects
    • Easter Projects
    • Fall Projects
    • Felt Projects
    • Halloween Projects
    • Jewelry Projects
    • Painting Projects
    • Recipes
    • Recycling Projects
    • School Projects
    • Sewing Projects
    • Spring Projects
    • Summer Day Camp Projects
    • Thanksgiving Projects
    • Valentine’s Day Projects
    • Wedding Projects
  • Craft Printables
  • Advent Crafts
  • Handmade Gifts
  • Young Living
  • Craft Swaps

Summer Day Camp | Sun Paper Art

July 15, 2014 by Alanna George Filed Under: How To, Summer Day Camp Projects 1 Comment

Share this:

  • Email
  • Print
  • Tweet
  • Share on Tumblr

Kid Crafts, Kid Craft, Summer Day Camp Craft, Sun Paper

We are kicking off the Summer Day Camp Series with a project using Sun Paper. Creating these little masterpieces using items from around your home is easy to do. The kids will love seeing how shadows turn into art!
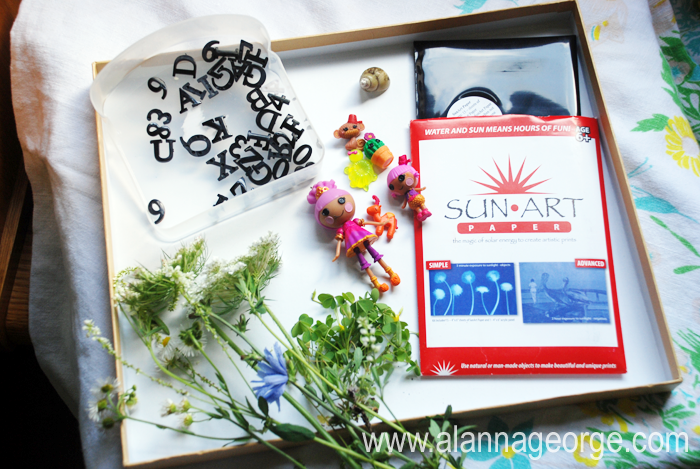
Sun Paper Supplies, Child Craft, Day Camp Craft

Supplies:

  • Sun Art Paper
  • Assorted Toys – Little Dolls, Tiny Cars, Tractors
  • Flowers
  • Plastic Letters or Letter Stickers
  • Large piece of Cardboard, Tray or Box Lid
  • Cutting board
  • Accessible Water – Faucet or Hose

How To:

1. The best time to use Sun Paper is on an extremely bright sunny day with no wind. It will work best if the sun is at its highest point in the sky. You will get the best images that way because no large shadows will be cast off of the objects you lay on the paper.

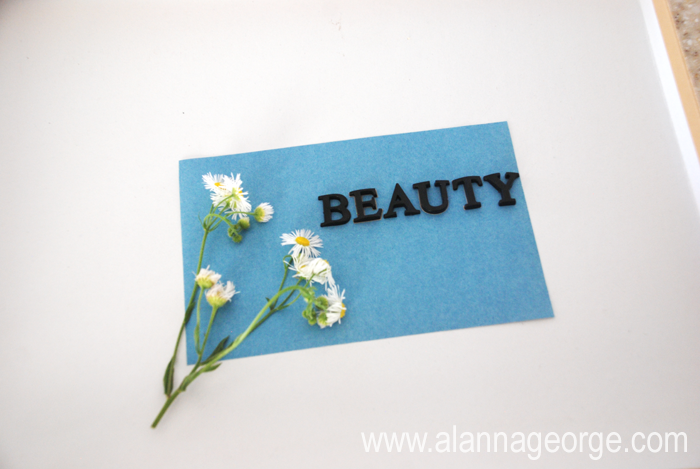
2. Choose a piece of Sun Paper. Prepare your creation in an area where there is no direct sunlight. Lay the Sun Paper on a large piece of cardboard or on a tray (any portable flat surface).  Quickly lay out all the pieces you want onto your Sun Paper.

SunPaperDolls2

Sun Paper Art Tedco, Project Sun Paper, How To Sun Paper

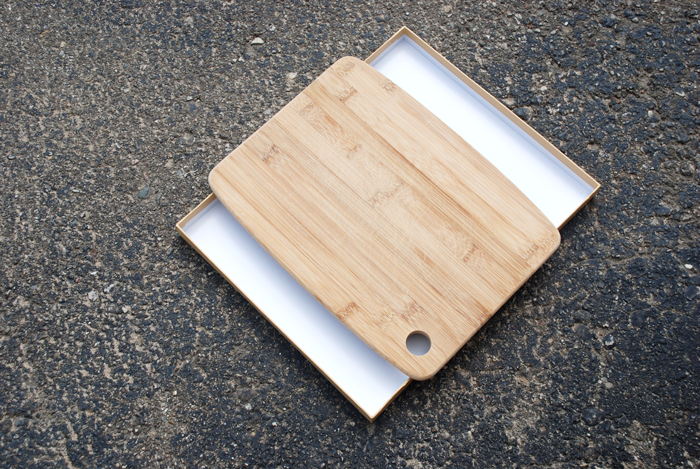
2. Cover your design with a cutting board or piece of cardboard. You don’t want your art to be exposed to the sun until you have it laying flat and still.

Beauty, Alanna George, Summer Day Camp, The Craft Nest

3. Carefully take your covered box lid with your Sun Paper art outside.

Sun Paper Art

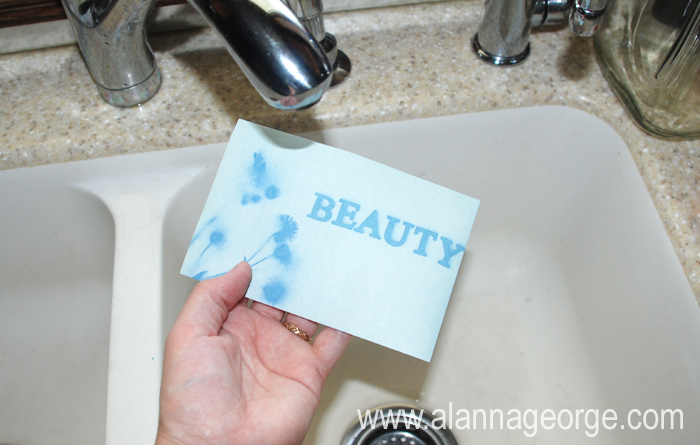
4. Lift off the cover and keep it absolutely still while your Sun Paper is exposed to the sun’s light. The paper starts off a medium blue color as shown below.

Sun Paper DIY

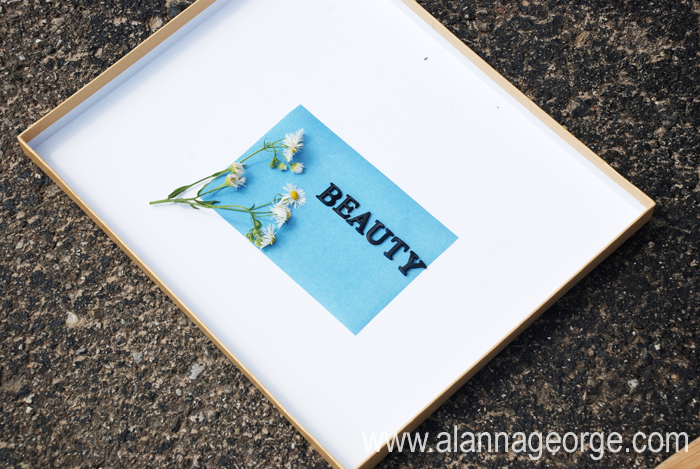
5. When it is finished being exposed it will be a very light blue, almost white.

Exposed Sun Paper

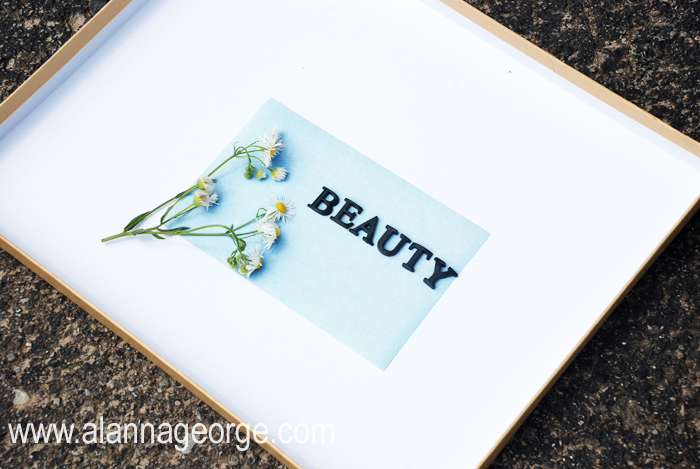
6. Cover it back up and take it inside. Pull the objects off the paper and you will see a shadow of what was on the paper.

Sun Paper, Day Camp, Craft Ideas Kid, Kids Idea Craft

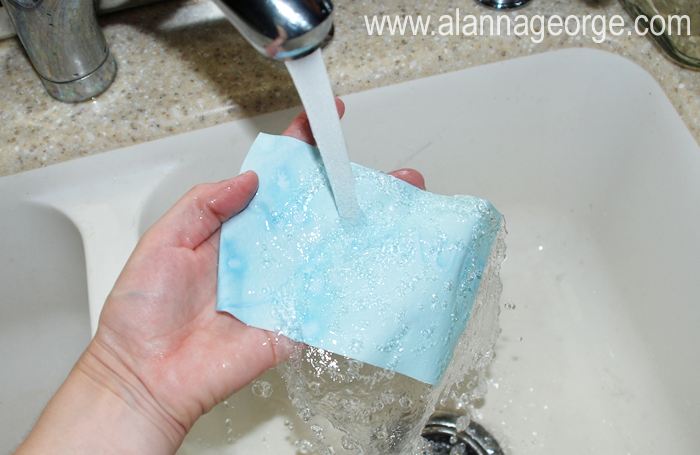
7. Rinse the entire piece of Sun Paper with water. Squeegee excess water off by running the paper between your first two fingers. Lay the wet Sun Paper on a towel to dry.

Sun Paper Rinse, Camp Crafts, Girl Scout Craft, Boy Scout Craft, Flower Craft

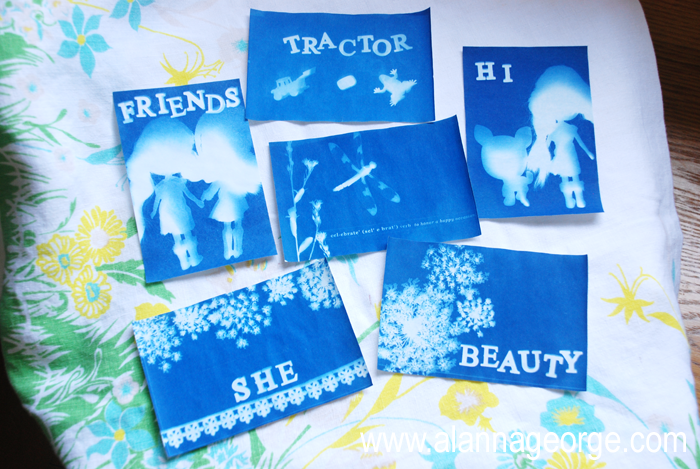
8. When the Sun Paper is completely dry it will like very dark indigo blue. Now you can frame your art or glue the art to the front of blank cards.

Finished Sun Art, Daisy Craft, Cub Scout Craft


Join us next week for another Summer Day Camp project. We love to read your comments, let us know if you have tried out a Summer Day Camp project from this year or a previous year.

Summer Day Camp Kids, Alanna George SUmmer Day Camp


Trackbacks

  1. SUMMER DAY CAMP: Sun Paper Art says:
    July 21, 2014 at 1:29 pm

    […] week’s post comes from Alanna George. She made some awesome sun paper art with her kiddos. Mine would totally love this. And thanks to my Amazon Prime Account, we could be […]

    Reply

Leave a Reply Cancel reply

Your email address will not be published. Required fields are marked *

CAPTCHA Image
Refresh Image

*

I love educating customers about safe oil usage for families!

Popular Posts

Summer Day Camp | Hula Hoop Hideout
Printable | Keep Calm - I Have Girl Scout Cookies
How To | Solar System Mobile
How To | Very Hungry Caterpillar Costume
Handmade Holidays | Magnetic Paper Dolls Tin
How To | Very Hungry Caterpillar Birthday Party
How To | Shark Boy Costume
Printable | Dinosaur Party Pack
Printable | Authentic Tooth Fairy Letterhead
How To | Toilet Paper Tube Pencil
Tippy Stockton Jewelry

Creativity kits for kids!

Daily Boutique Deals

Creative scrapbooking in minutes with Smilebox.

Archives

USFamilyGuide.com `

Creative Commons License
This work is licensed under a Creative Commons Attribution-NonCommercial-ShareAlike 3.0 Unported License.

© Copyright 2007-2014, Alanna George. All rights reserved. For permission to reproduce contents or images from this site, please email alannageorge@alannageorge.com.

I was a Design Manager in the scrapbooking industry until the birth of my first child. I then turned freelance designer, crafter and stay-at-home mom. I reside in Michigan with my husband and our four kids. Read More…

Get Posts To Your Inbox

Enter your email address:

Delivered by FeedBurner

  • About Me
  • Advertise
  • Disclosure Policy
  • Linky Parties
  • Blogroll

Copyright © 2017 · Alanna George | The Craft Nest · Swank WordPress Theme By, PDCD

loading Cancel
Post was not sent - check your email addresses!
Email check failed, please try again
Sorry, your blog cannot share posts by email.