Share this:

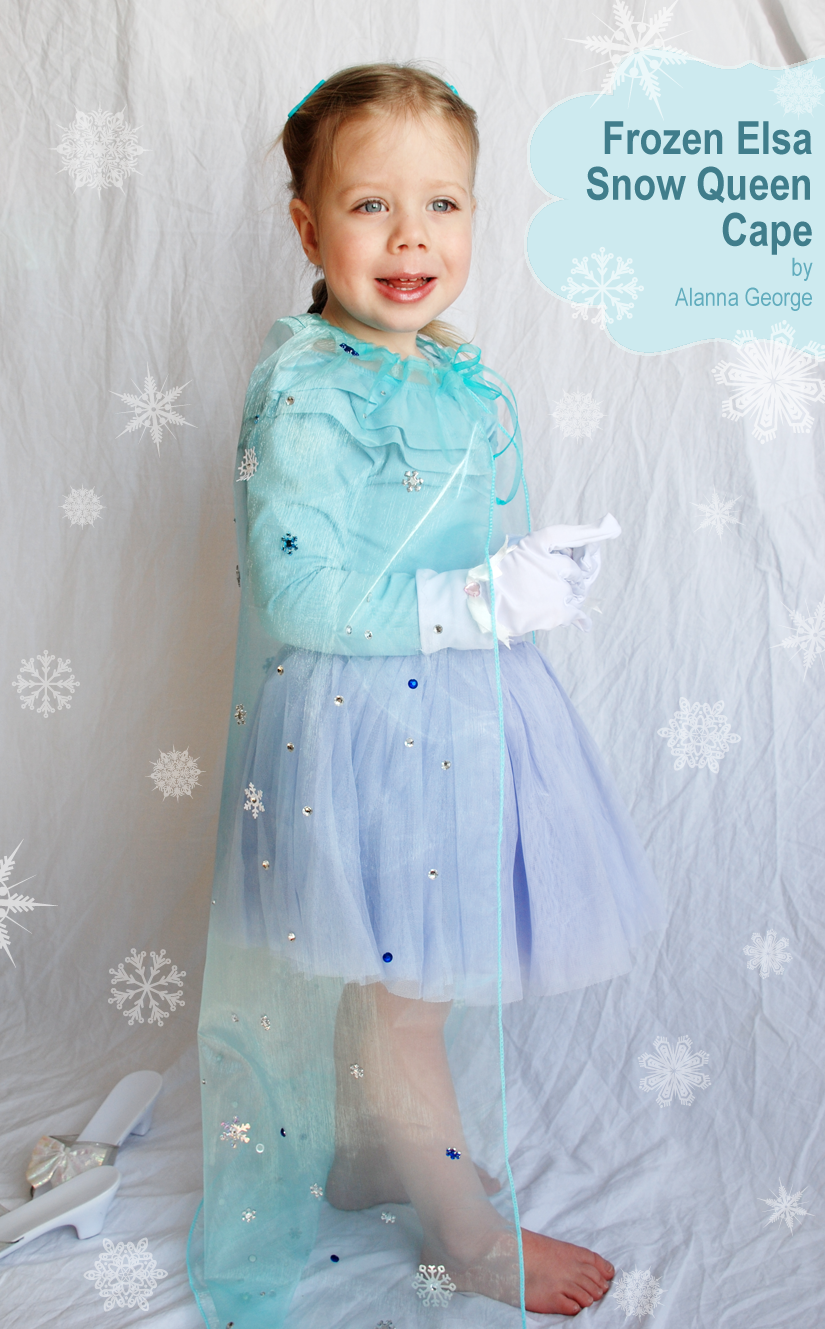
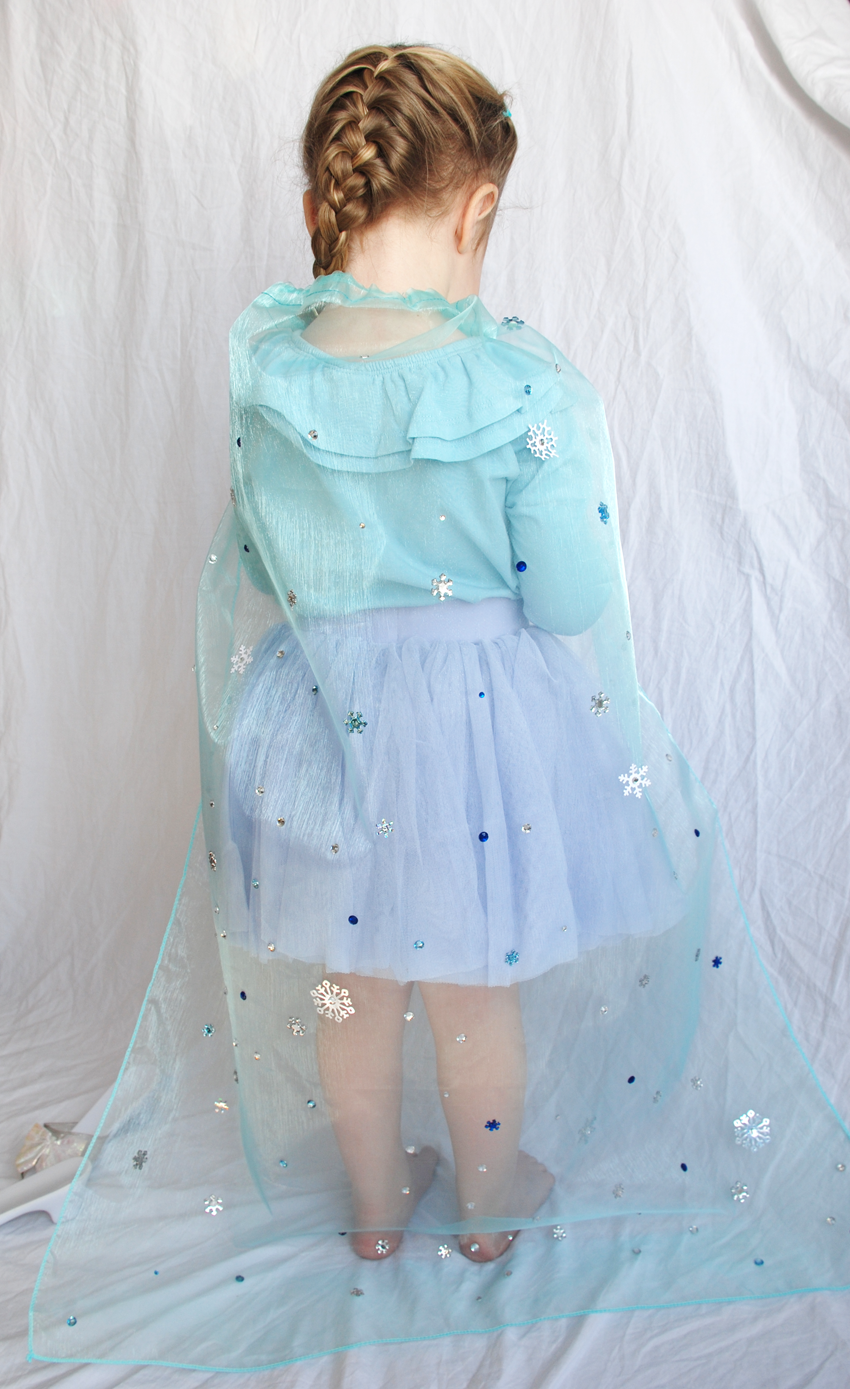
If your daughter is anything like mine, then Disney’s “Frozen” and Elsa the Snow Queen may be an all day topic in your home. My three year old is in love with all things Elsa; Elsa’s songs, Elsa’s braid, Elsa’s gloves and Elsa’s ice castle, just to name a few. The now-famous Snow Queen inspired me to make this icy looking snow cape so my daughter can pretend to be Elsa to her hearts desire! This post first appeared for Darice on their blog – Live.Craft.Love
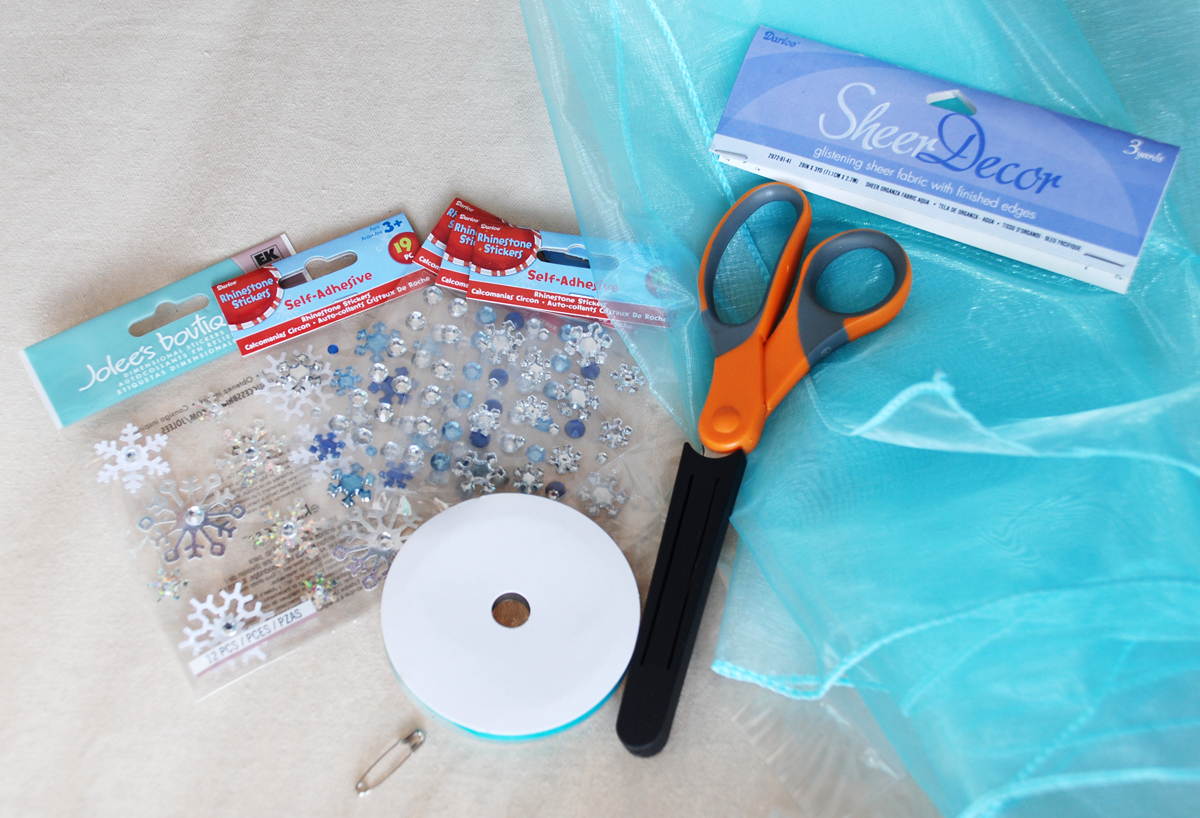
Supplies:
- Darice Sheer Decor aqua organza fabric
- Blue and clear rhinestone stickers
- Jolee’s Boutique Dimensional Snowflakes
- Turquoise organza ribbon
- Scissors
- Safety pin
- Sewing machine
- Straight pins
How To:
Using your Sheer Organza, measure your child for the cape length and cut the fabric to desired length. The long outside edges of the cape are already finished for you.
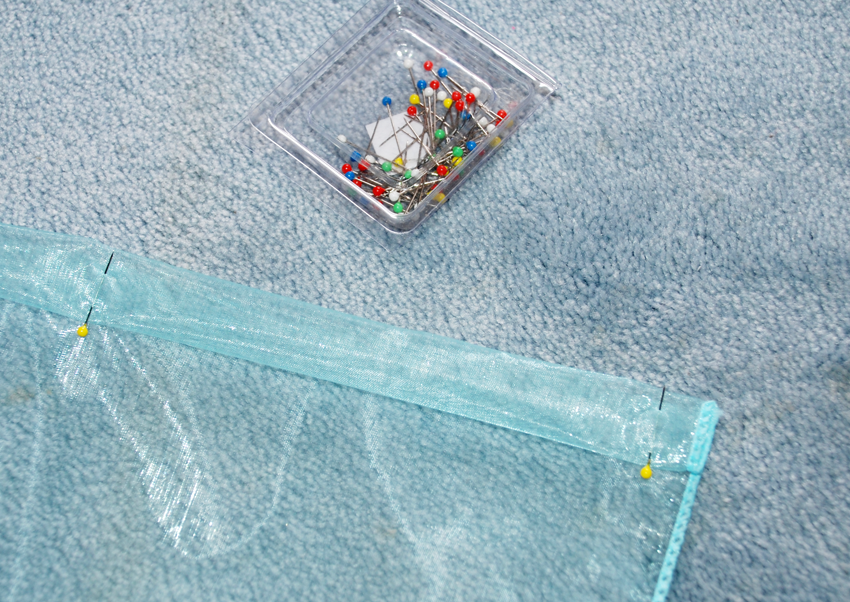
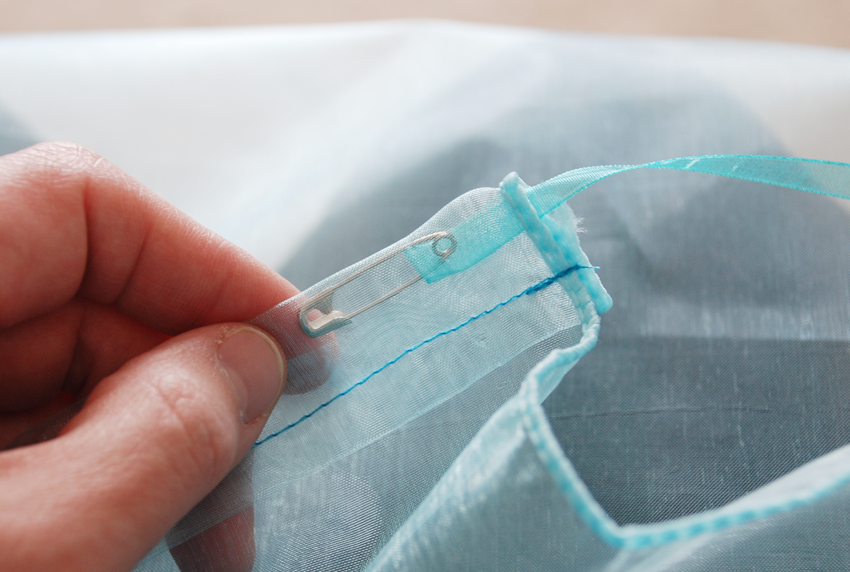
Fold the unfinished edge over twice and pin. This will create a tube for you to thread the ribbon through to create the tie for the cape.
Sew along pinned edge of the cape.
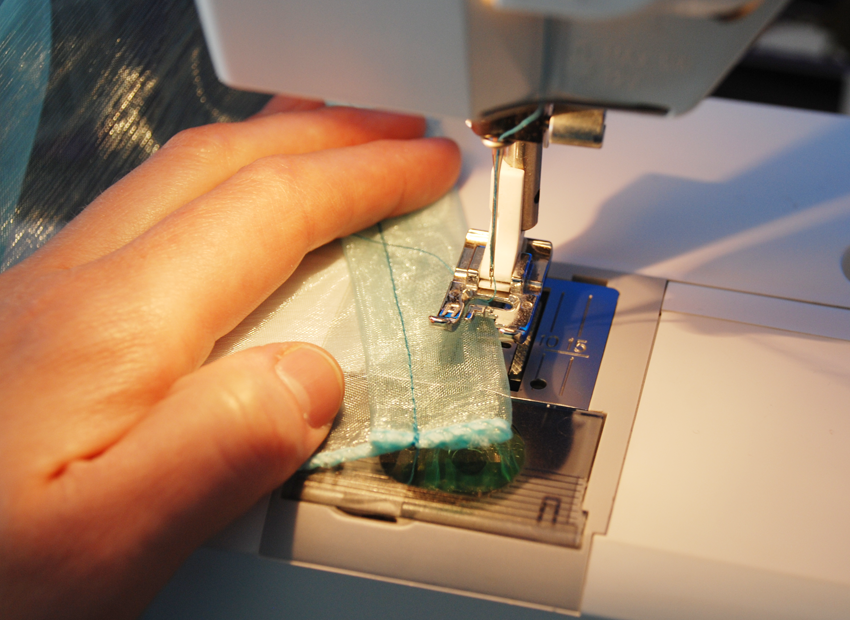
Cut a 20″ piece of ribbon. Attach the safety pin to one end of ribbon. Insert safety pin with ribbon into one end of the sewn tube. Continue to push the safety pin with ribbon through the tube and out the other end.
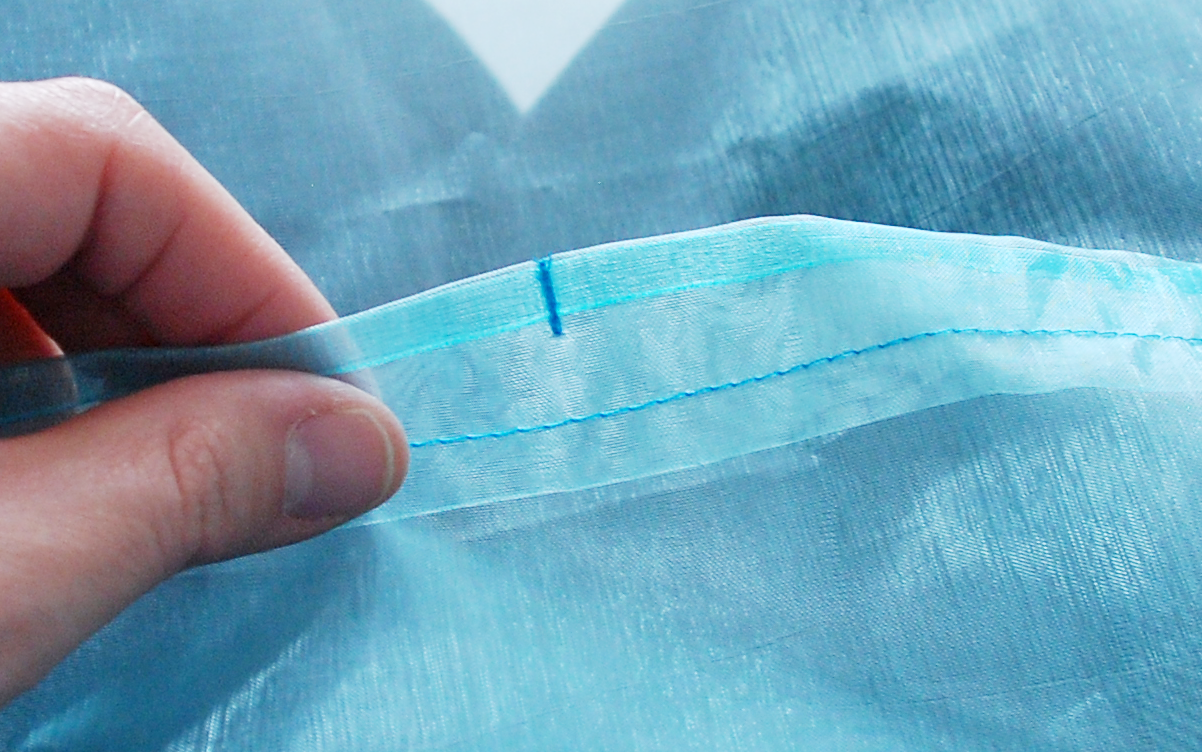
Once the ribbon is all the way through, center it across the top of the cape. Use your sewing machine to stitch the ribbon in place in the center of the cape. This will prevent the ribbon from pulling out.
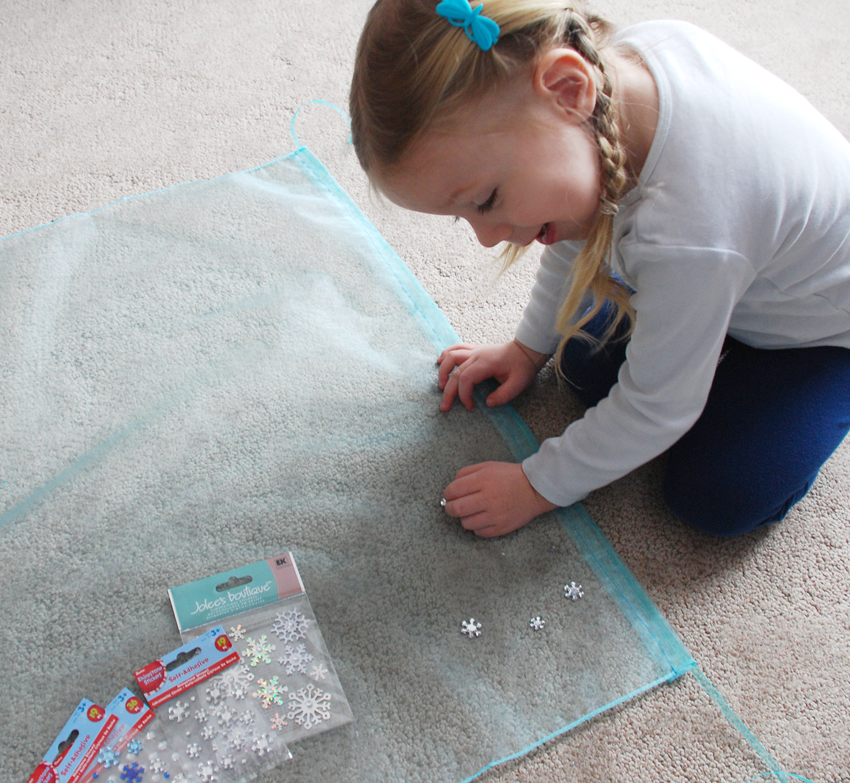
Stick self-adhesive rhinestones and snowflakes all over your cape.
Wear your Frozen cape and pretend to be Elsa the Snow Queen!
Leave a Reply