Share this:


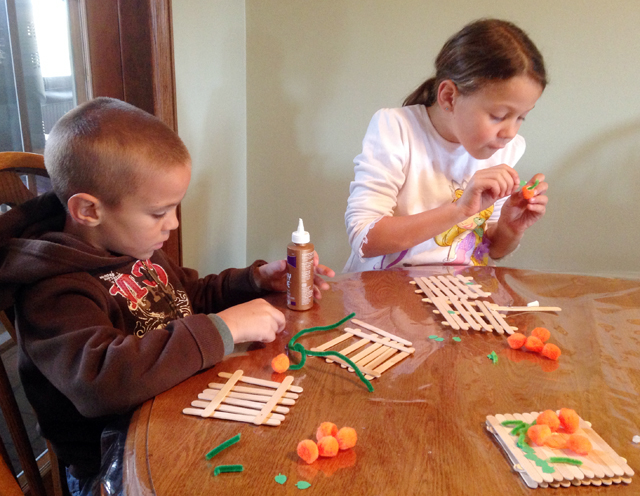
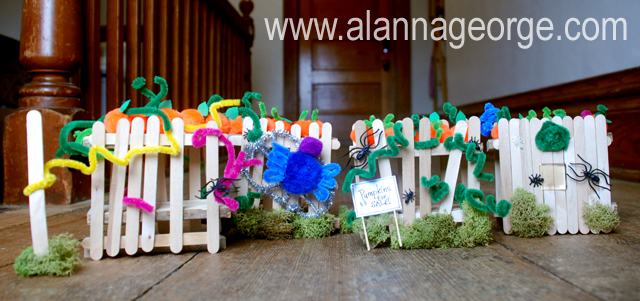
Halloween is approaching quickly! Do you remember the Five Little Pumpkins Song? Each of my kids has learned it in Preschool. I thought it would be fun to make our own miniature fences for 5 little pumpkins to sit on. Each of us made our fences completely different and we had so much fun. Read on to see how to make your own fence.
Five Little Pumpkins Song:
Five little pumpkins sitting on a gate,
First one said “Oh my, it’s getting late!”
Second one said “There are witches in the air,”
Third one said “but we don’t care!”
Fourth one said “Let’s run and run and run.”
Fifth one said “I’m ready for some fun!”
Ooo ooo went the wind, and out went the lights,
And five little pumpkins rolled out of sight.
You can use a lot of different craft supplies to decorate your fence. My kids came up with all sorts of things to make and add to their fences to make it uniquely their own. Have the glue ready, LOL!
Supplies:
- Craft Sticks
- 1″ Orange Pom-Pom Balls
- Green Pipe Cleaners
- Leaf Punch
- Green Paper
- Moss
- Plastic Spiders and/or Ants
- Fake Spider Webs (I couldn’t find ours, but we wanted to stretch some on our fences!)
- Craft Glue
- 2 – Wooden Rectangle Spacer (can be made of balsa wood)
- Wire Cutter
How To: – click on the pics below for a closer view
-
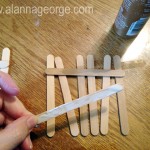
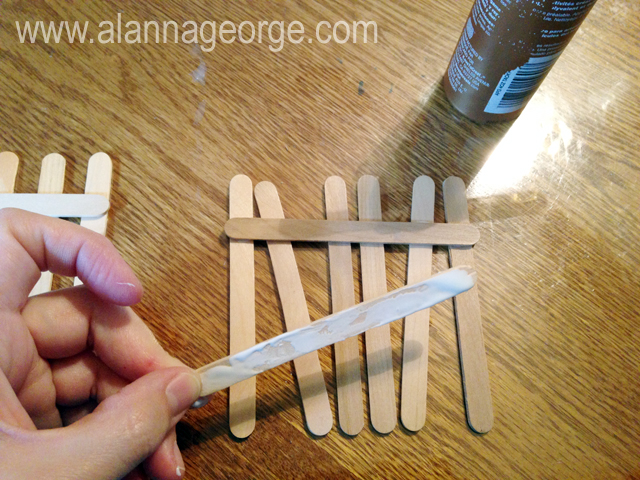
Lay out your craft sticks vertically to create your fence. Use two craft sticks and glue them horizontally to hold the vertical sticks in place. Let dry.
- Create your second fence side the same way. Make sure you lay the two fences side by side. You need to have the horizontal sticks the same distance from the top and bottom as you did on the first fence. This will be important later when you add the wooden rectangles to the center to make your fence stand up and create a shelf for the pumpkins to sit on.
-
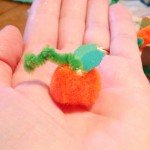
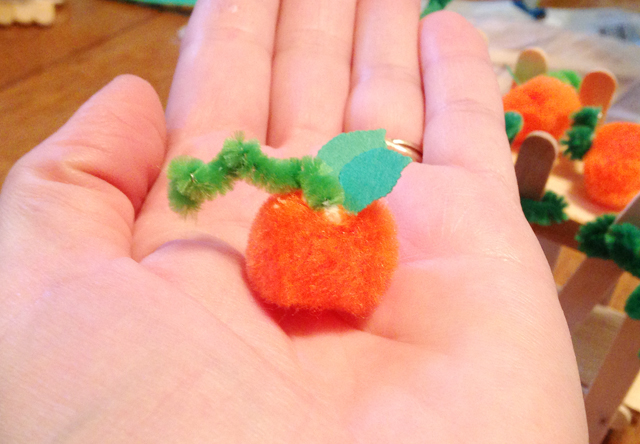
Create your 5 pumpkins by cutting a stem from a green pipe cleaner. Glue stem to top of pom-pom ball. Use leaf shaped punch to punch out leaf from green paper. Glue leaf to pom-pom ball next to stem.
-

Finish creating all your fence sides and your pumpkins and set them aside to dry.
-
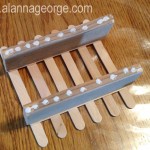
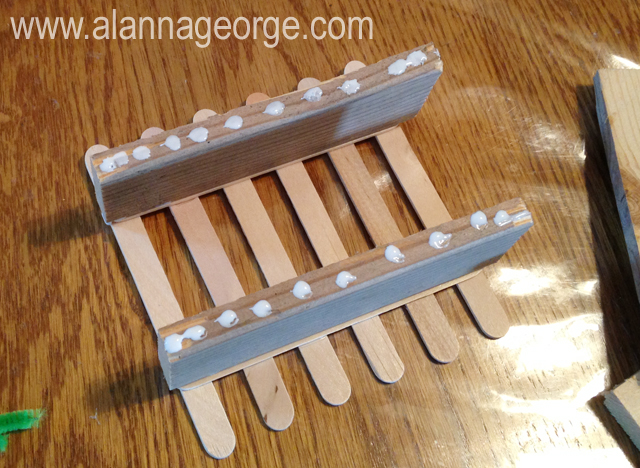
Cut the wood you will use for your spacer to be same length as a craft stick. They can be about 1″ – 1.5″ wide. Glue the a wooden rectangle to the each horizontal craft stick on one fence side. Next glue on the 2nd fence side. Let dry.
- Now your fence should be complete. Add your own spooky and fun decorations to your fence. Sit your pumpkins on the top shelf of your fence.
- Sing the Five Little Pumpkins song while you play with your fence.